


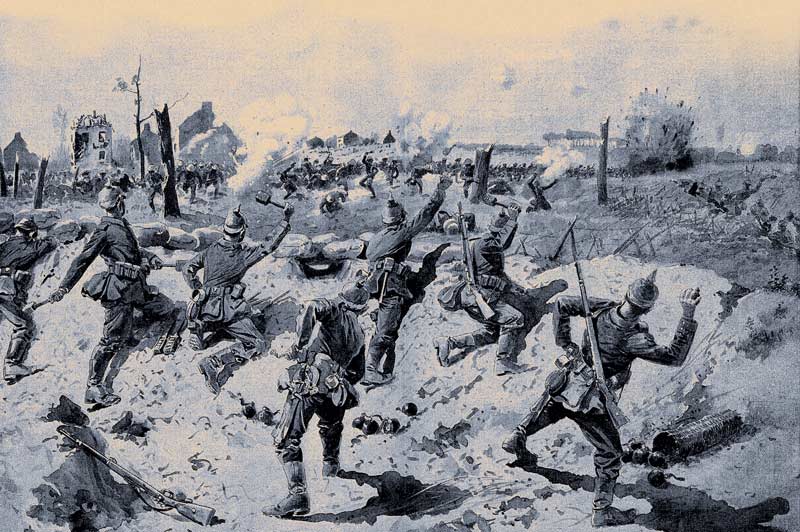
An artist depicts April 1916 fighting in the St. Eloi area. [Ernst Zimmer/State Library of Upper Austria/Wikimedia]
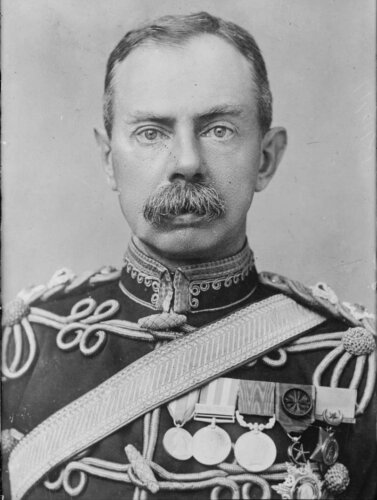
On April 4, 1916, 2nd Canadian Division’s 6th Brigade commanded by Brigadier-General Huntly Ketchen took over the front lines of the St. Eloi battleground from 3rd British Division’s 76th Brigade. As the Canadians moved into shallow trenches clinging to the sides of massive craters, one called to the soldiers he was relieving a customary Western Front greeting: “Cheer up! Don’t be downhearted.”
“You’ll be downhearted,” a mud-spattered Tommy whispered morosely, “when you see what’s up there. I have lost my best chums.”
The Canadians quickly appreciated the warning. The St. Eloi area about five kilometres south of the largely devastated town of Ypres was to serve as the Canadian Corps’ introduction to what would prove to be, in the words of the late pre-eminent First World War historian Tim Cook, “a year of mayhem and battle.”
The landscape the Canadians entered bore little resemblance to anything natural. It had been utterly transformed by the outcome of a remarkable mining project conducted by British sappers—many of them miners in civilian life. After months, these engineers had tunnelled about 300 metres beyond a narrow British-held salient south of the village of St. Eloi to cross no man’s land to get underneath a slight rise of German-held ground nicknamed the Mound. The aim? To win from below what had proven impossible to take on the surface.
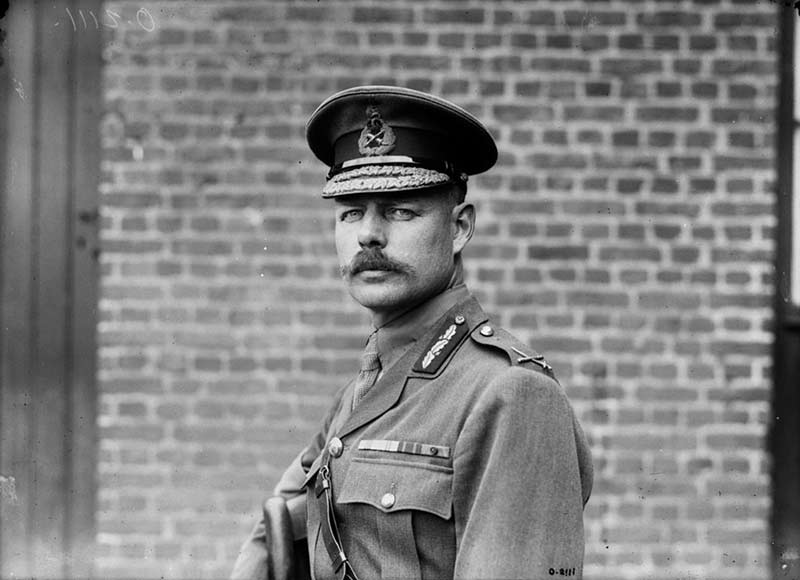
Brigadier-General Huntly Ketchen. [DND/LAC/PA-002202]
In the early part of 1915, the Western Front had stagnated into fixed lines from which neither British nor German forces could gain any decisive advances. Desperate to seize the initiative, both sides began advancing underground, digging below the opposing lines and creating large caverns into which explosives were emplaced then detonated. The resulting demolitions collapsed trench systems above and created vast craters. Immediately following an explosion, infantry supported by massed artillery barrages would dash forward to overwhelm whatever dazed survivors remained.
Initially, both German and British sappers worked at depths of only one to three metres to create tunnels that, when detonated with light charges, disrupted the opponents’ own similar efforts. By late 1915, however, the British ratcheted up the warfare mining tactic by digging even deeper. The ground of much of the Ypres salient was sandy to 15- to 45-metres deep. Below that lay hard-packed strata and it was into this that the British tunnellers dug. So enthusiastic was British command about the strategy that by December 1915, more than 20 tunnelling companies existed—including three Canadian units, though only the 3rd Canadian Tunnelling Company was then on the ground in France.
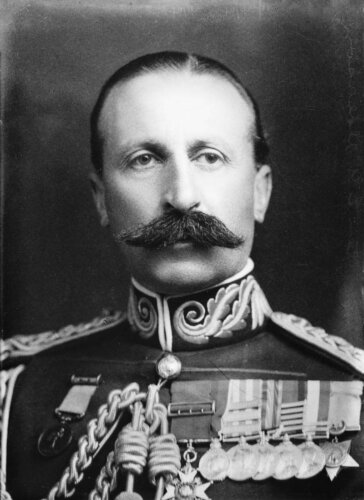
The Mound provided the Germans an ideal position overlooking British lines, and from which artillery could be fired. As such, it was identified by British Second Army’s General Hubert Plumer as a prime target for one of the most extensive mining schemes his sappers had yet undertaken.
By early March, ammonal charges from 270 to 14,000 kilograms had been placed in six mines. As the work was completed, a relief plan was developed whereby the Canadian Corps was to relieve the British V Corps. Lieutenant-General Edwin Alderson, a Brit in command of the Canadians, proposed the coming attack be launched by his 2nd Division. Plumer, however, pointed out that V Corps’ 3rd Division was already well advanced in preparing for the attack, having practiced against mock German lines. So, the Brits would attack and once they had consolidated a new line beyond the soon-to-be-created craters, the Canadians would take over.
The explosion “leapt to heaven in a colossal shower of yellow smoke and debris; it shook the earth like the sudden outburst of a volcano.”
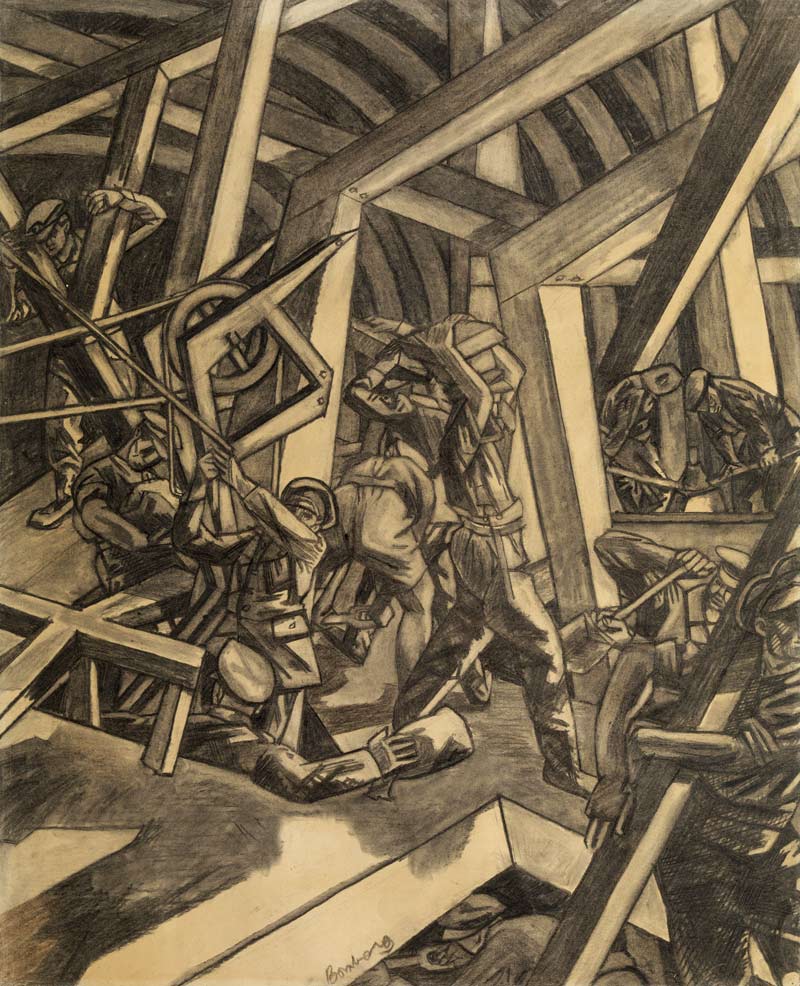
An artist depicts Canadian tunnellers at work near St. Eloi. [David Bomberg/Imperial War Museums/Wikimedia]
British General Hubert Plumer had identified the area as a prime target for a mining operation.[David Bomberg/Imperial War Museums/Wikimedia]
His compatriot Lieutenant-General Edwin Alderson commanded the Canadians.[David Bomberg/Imperial War Museums/Wikimedia]
At 4:15 a.m. on March 27, 41 artillery pieces opened fire and the six mines detonated in a matter of seconds. The ensuing explosion “leapt to heaven in a colossal shower of yellow smoke and debris; it could be seen from miles away and shook the earth like the sudden outburst of a volcano,” wrote Max Aitken, Canada’s military representative at the front. “Trenches on both sides collapsed…. Old landmarks were blotted out.”
With the last clods of earth still falling, British troops rushed forward and secured five of the seven craters created by the blasts. Two of the craters, however, were taken by neither side—the British, finding the landscape so devastated and changed from what their maps showed, hunkered down in large holes they mistook for craters. This left a large gap in the line for three days, at which point the regrouped Germans seized one of the two while the British then occupied the other. After a week of intense, close-quarters combat, the Brits ousted the Germans from the one crater, but the effort left 3rd Division spent.
Three years later, the St. Eloi landscape remains devastated[DND/LAC/PA-004590]
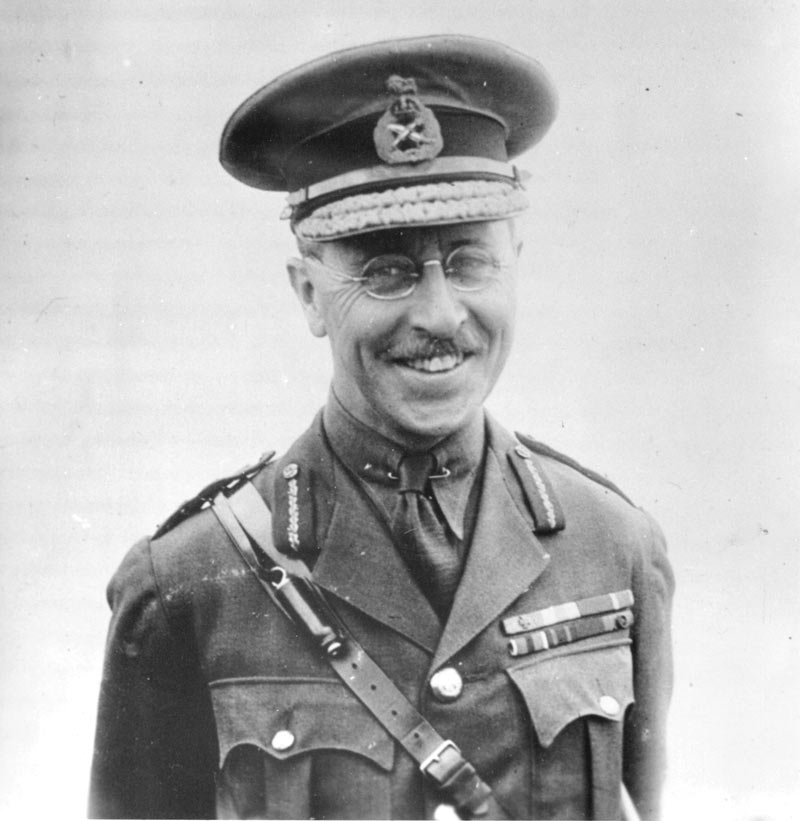
Major-General Richard Turner. [Legion Magazine Archive]
On the night of April 3-4, the Canadian Corps switched places with V Corps. This was the first time a corps-level relief was conducted by the British Expeditionary Force and conformed with Canadian government insistence that their corps must always enter and leave the front line together.
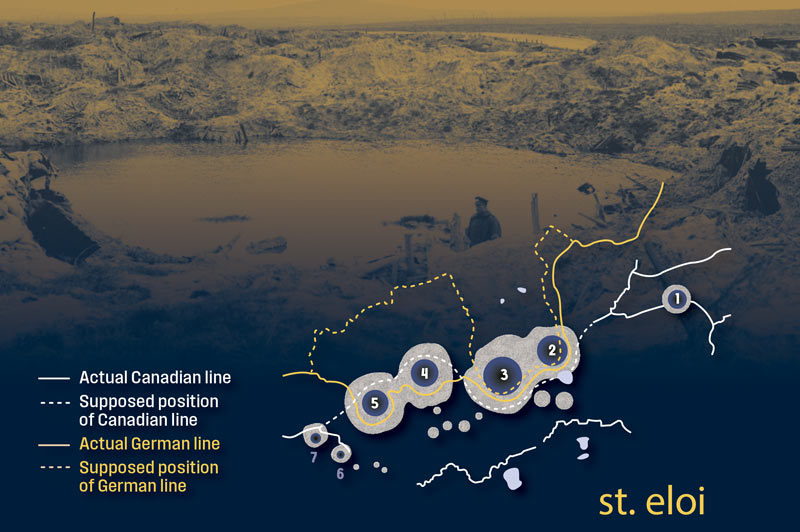
Exhausted British scouts tried to guide the Canadians to assigned positions, though they often got lost in the devastated battlefield. Two 6th Brigade battalions, the 27th and 31st, waded into what they discovered was just a 600-metre-wide salient where the only defensive works were shallow ditches rather than an interlinked trench system. Sergeant A.H. Bell described the Canadian position as stuck “on a forward slope, in full view of the enemy.” This was particularly true for the German artillery spotters on nearby Wytschaete ridge, for whom the entire area was “spread out like a map.”
Canadian commanders and artillery observers, conversely, could only see beyond the edges of the craters that formed their skyline when the sun was low and not in their eyes. There were no reserve lines. These had been obliterated to a depth of 1,000 metres since the initial British attack. Blown so closely together, the four central craters formed an impassable obstacle that made it impossible to create any coherent communication system from the front to the rear. Alderson, 2nd Division’s Major-General Richard Turner and Ketchen consequently had virtually no idea what was happening ahead of them. This created much misunderstanding as to what ground the Canadians did or didn’t hold.
Turner remained optimistic. Given time, he believed, “we could make a pretty good line of the position selected, but that a great amount of work would be required.”
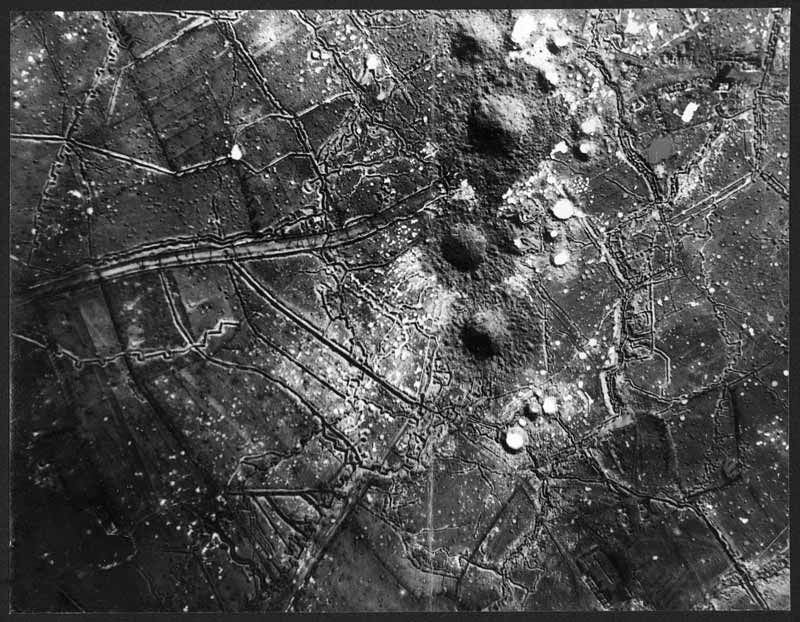
An aerial photo taken in late-March 1916 after the St. Eloi mines were blown. [National Library of Scotland/Wikimedia]
Third Division’s commander—having had some crater-fighting experience—offered Turner much advice on how to strengthen his defences and misdirect the German artillery away from his troops. Ketchen grimly noted that the British hadn’t implemented any of these suggestions and felt his brigade’s situation was tenuous. German artillery fire was unrelenting, described by one British artillery officer—who had been in the Ypres salient for almost a year—as the heaviest he had endured.
During one bombardment, a 200-metre trench section held by 27th Battalion was demolished. A section of 31st Battalion’s trench was exposed to German machine-gun fire from a nearby flanking position. Snipers were active from positions just 150 metres from the Canadians. By the evening of April 5, the two battalions had lost contact with each other. Later that night, Ketchen directed his 29th Battalion to relieve the badly depleted 27th, which had lost 40 killed and 189 wounded in three days.
Hand-to-hand fighting by desperate soldiers continued for hours with little mercy shown by either side. This only worsened the Canadian position.
Confusion and congestion in the mud-drenched trenches delayed the relief, and it was still underway at 3:30 a.m. when, following a heavy artillery bombardment, a two-battalion strong counterattack struck. Craters 2, 3, 4 and 5 were all lost. In less than three hours, all the ground won by the British between March 27 and April 3 was again in German hands.
The Canadians immediately counterattacked, ordered by Turner, to recover what they had lost. Hand-to-hand fighting by desperate soldiers continued for hours with little mercy shown by either side. This only worsened the Canadian position. The craters remained in German hands and those soldiers who managed to reach them were annihilated.
Confusion ruled. Repeatedly, Canadian companies reported having won a specific crater only to discover they were somewhere else entirely. On the night of April 6-7, 28th Battalion sent 75 specialized bombers armed with grenades and protected by two infantry companies to recapture Crater 5. Moving through heavy rain and showering enemy shellfire, the force lost its way and ended up taking a cluster of craters north of Crater 4. Ketchen’s brigade was done and relieved later that night by Brigadier-General Ronald Rennie’s 4th Brigade. In four days of fighting, 6th Brigade suffered 617 casualties.
Determined to regain the initiative, Turner presented two options to Alderson. He could either “evacuate the craters, and…shell the Germans out of the line they held, in the same way that they had dealt with us,” or “attack on a wider frontage…and to consolidate the ground gained; thus giving the German artillery a wider objective for their retaliation.”
Alderson ruled out the wider attack because there was no chance of achieving surprise with such an exposed front line. Also, the Canadians were already engaged in building up manpower and materiel for a forthcoming projected offensive on the Somme. When Alderson took the idea to Plumer, the army commander demurred. Mistakenly believing only two craters had been lost, he ordered the Canadians to hold their current positions while also retaking them.
On the night of April 8-9, 21st Battalion attacked Craters 2 and 3 from the west only to be repulsed by rifle and machine-gun fire. A three-battalion assault 24 hours later also failed. A German counterattack the following night was driven off by grenades thrown by Canadian bombers. On April 12-13, 5th Brigade relieved 4th and was organizing an attack on the German-held craters when Alderson and Turner agreed instead to just hold the line.
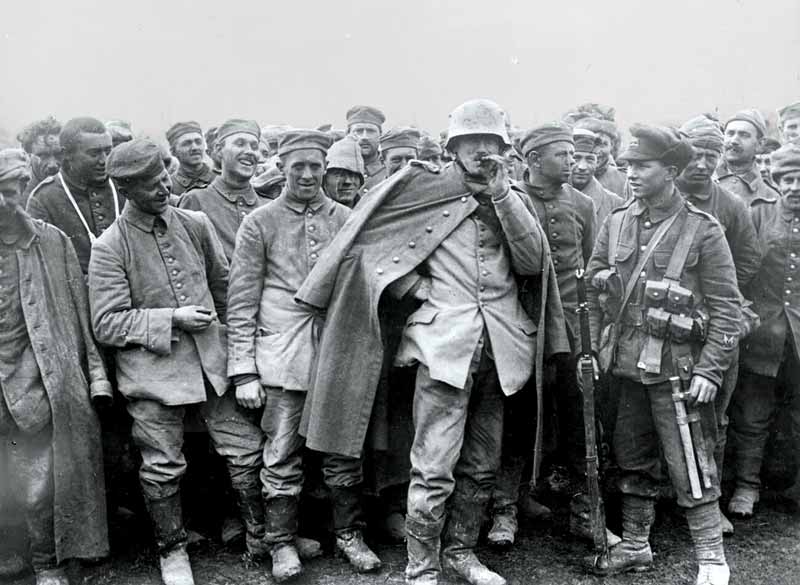
German prisoners captured during the Battle of St. Eloi. [Imperial War Museums/Wikimedia]
Despite all contrary evidence, 2nd Division’s daily intelligence summary for April 15 persisted in perpetuating the belief that only Craters 2 and 3 had been lost.
“At 2:30 a.m.,” the summary reported, “assisted by artillery fire, the enemy made a bombing attack on Craters 4 and 5…. The craters were both in our possession and there are no casualties.”
But, the 24th Battalion’s Major J.A. Ross had discovered during a personal reconnaissance that Craters 2, 3, 4 and 5 were all in German hands. Aerial reconnaissance—previously impossible due to the inclement weather—confirmed his report on April 16. Divisional staff, having finally accepted reality, cancelled any further attacks.
“It seems extraordinary yet if one thinks of it quietly and calmly,” Alderson wrote in a memo to Turner, “it is not only a very likely, but almost a natural outcome of the conditions under which your Division took over the line…. Our Army Commander, gallant gentleman as he is, has taken it well though he is probably the most hit, because the Army originated the situation.”
The landscape the Canadians entered bore little resemblance to anything natural
For two more weeks, the situation only worsened. Preparations for the Somme Offensive led to artillery supply restrictions that enabled the Germans to ready themselves. On the 19th, they cleared Craters 6 and 7 but left them unoccupied. The Canadians lacked the strength to take them back. Both sides let the battle fizzle and the lines stagnated. German losses recapturing the craters and during the subsequent fighting totalled 483, while between April 4 and 16 the Canadians suffered 1,373 casualties.
The St. Eloi battlefield remained a hellhole well after the guns had largely fallen silent and 2nd Division stayed in the line there until the beginning of June. On April 27, a 2nd Canadian Pioneer Battalion patrol had rescued 29th Battalion’s Private Stanley Harcourt Warn from where he had lain for nine days amid rotting bodies in no man’s land. Having suffered shrapnel wounds to his legs, arms and head, Warn had also developed trench foot. The 31-year-old soldier’s legs and arms were permanently disabled.
A scapegoat was sought for the overall disaster and eventually Alderson took the blame. On May 28, 1916, he was relieved by Lieutenant-General Julian Byng. St. Eloi was a Canadian loss, but it would be the last.
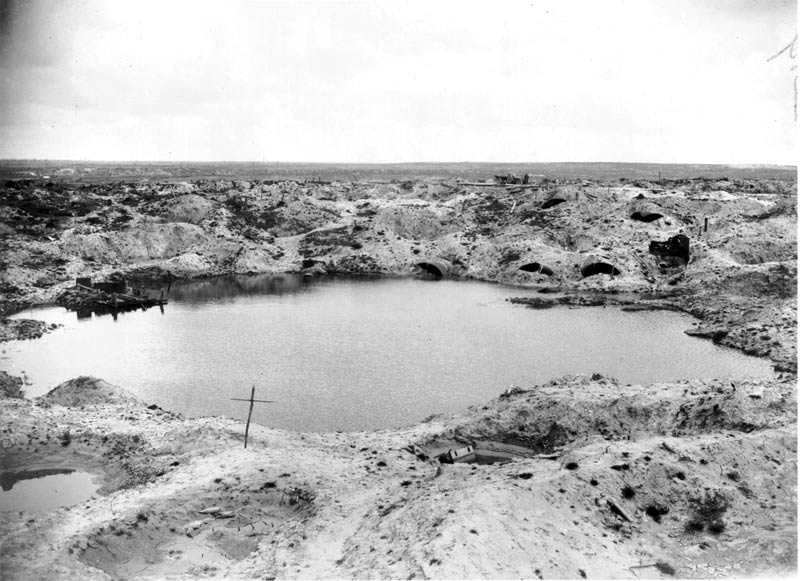
Three years after the battle, the area remains pockmarked. [DND/LAC/PA-004394]
Advertisement