


A handful of Canadians played modest roles in the historic demise of the Nazi battleship 75 years ago
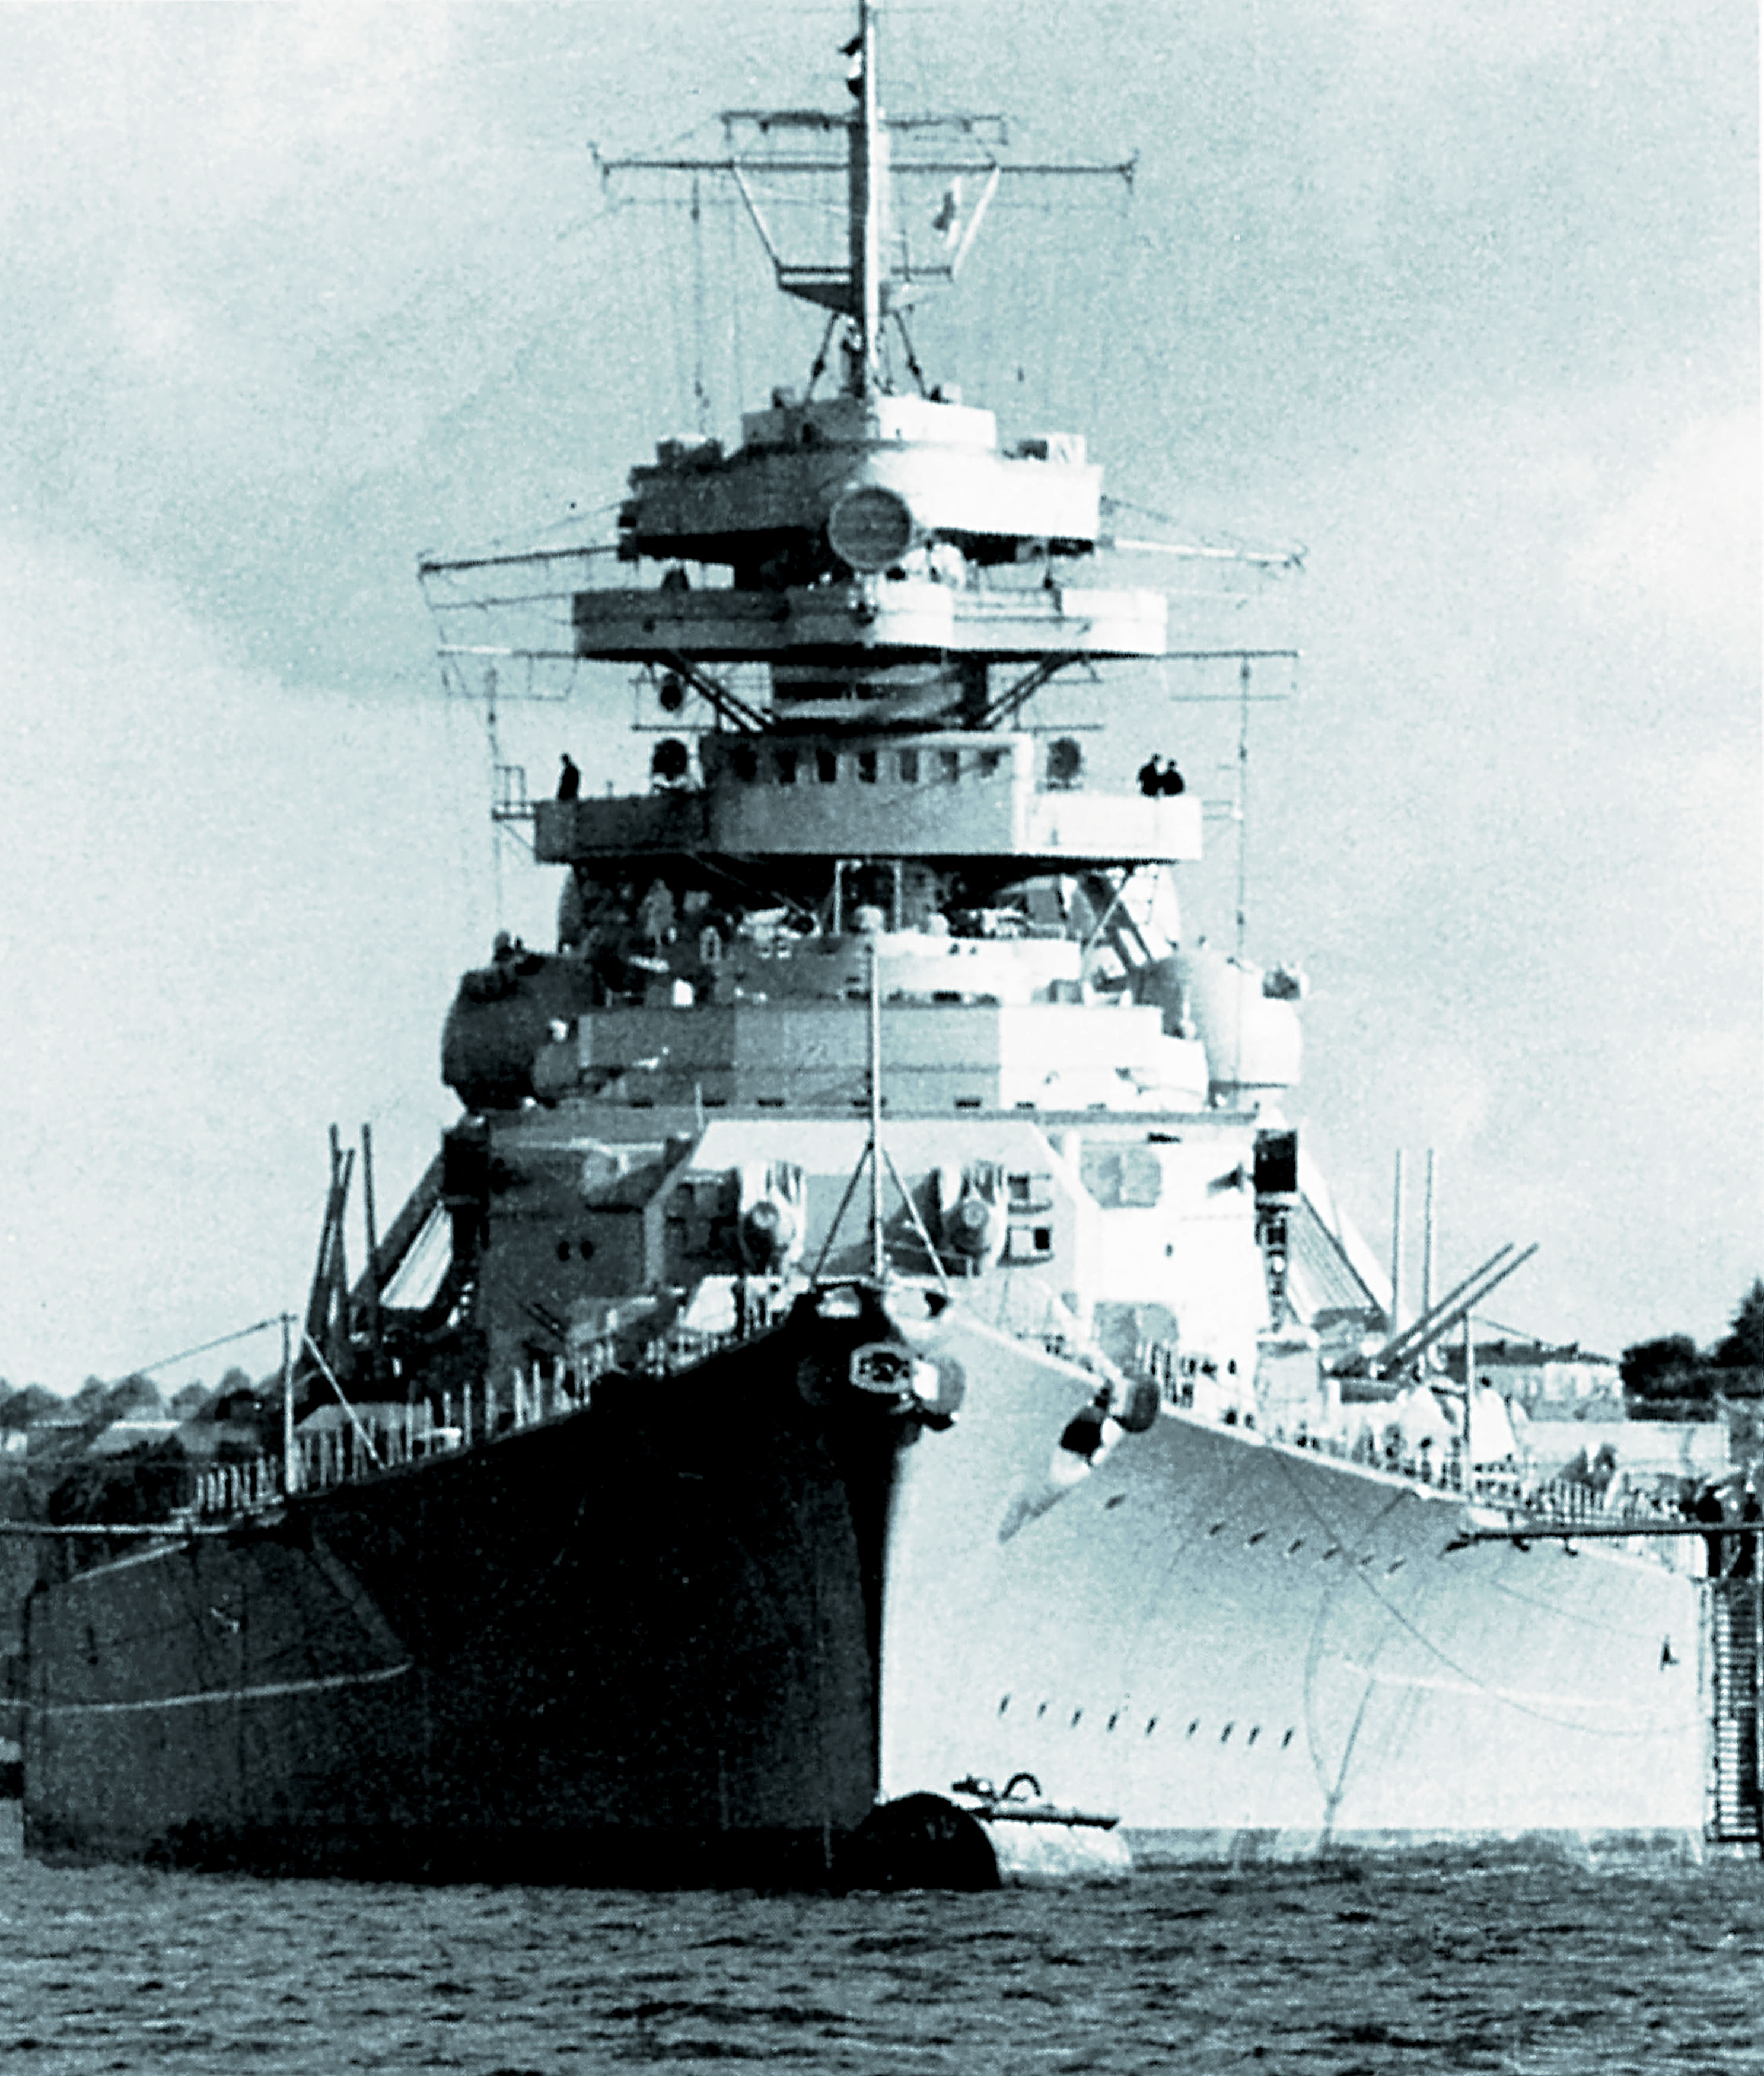
On May 21, 1941, the most powerful warship in Europe disappeared from her anchorage in Bergen, Norway. The British, anxiously watching and waiting, could surmise where the brand new 50,000-tonne battleship Bismarck was going: to the broad reaches of the North Atlantic Ocean and the convoy lanes that sustained Britain herself. Over the next seven days, one of the great dramas of the Second World War played out until, on May 27, Bismarck was cornered and sunk.
No Canadian warships were directly involved in the Bismarck episode. At that stage of the war, the Royal Canadian Navy lacked the fleet-class destroyers and cruisers needed for such perilous work. While Bismarck was loose on the North Atlantic, a small gaggle of new RCN corvettes arrived at St. John’s to establish the Newfoundland Escort Force and begin a very different kind of war. But Canadians were involved in almost every facet of the destruction of the Bismarck, from intelligence gathering and air strikes to surface gunnery actions. Several of them were killed in action.
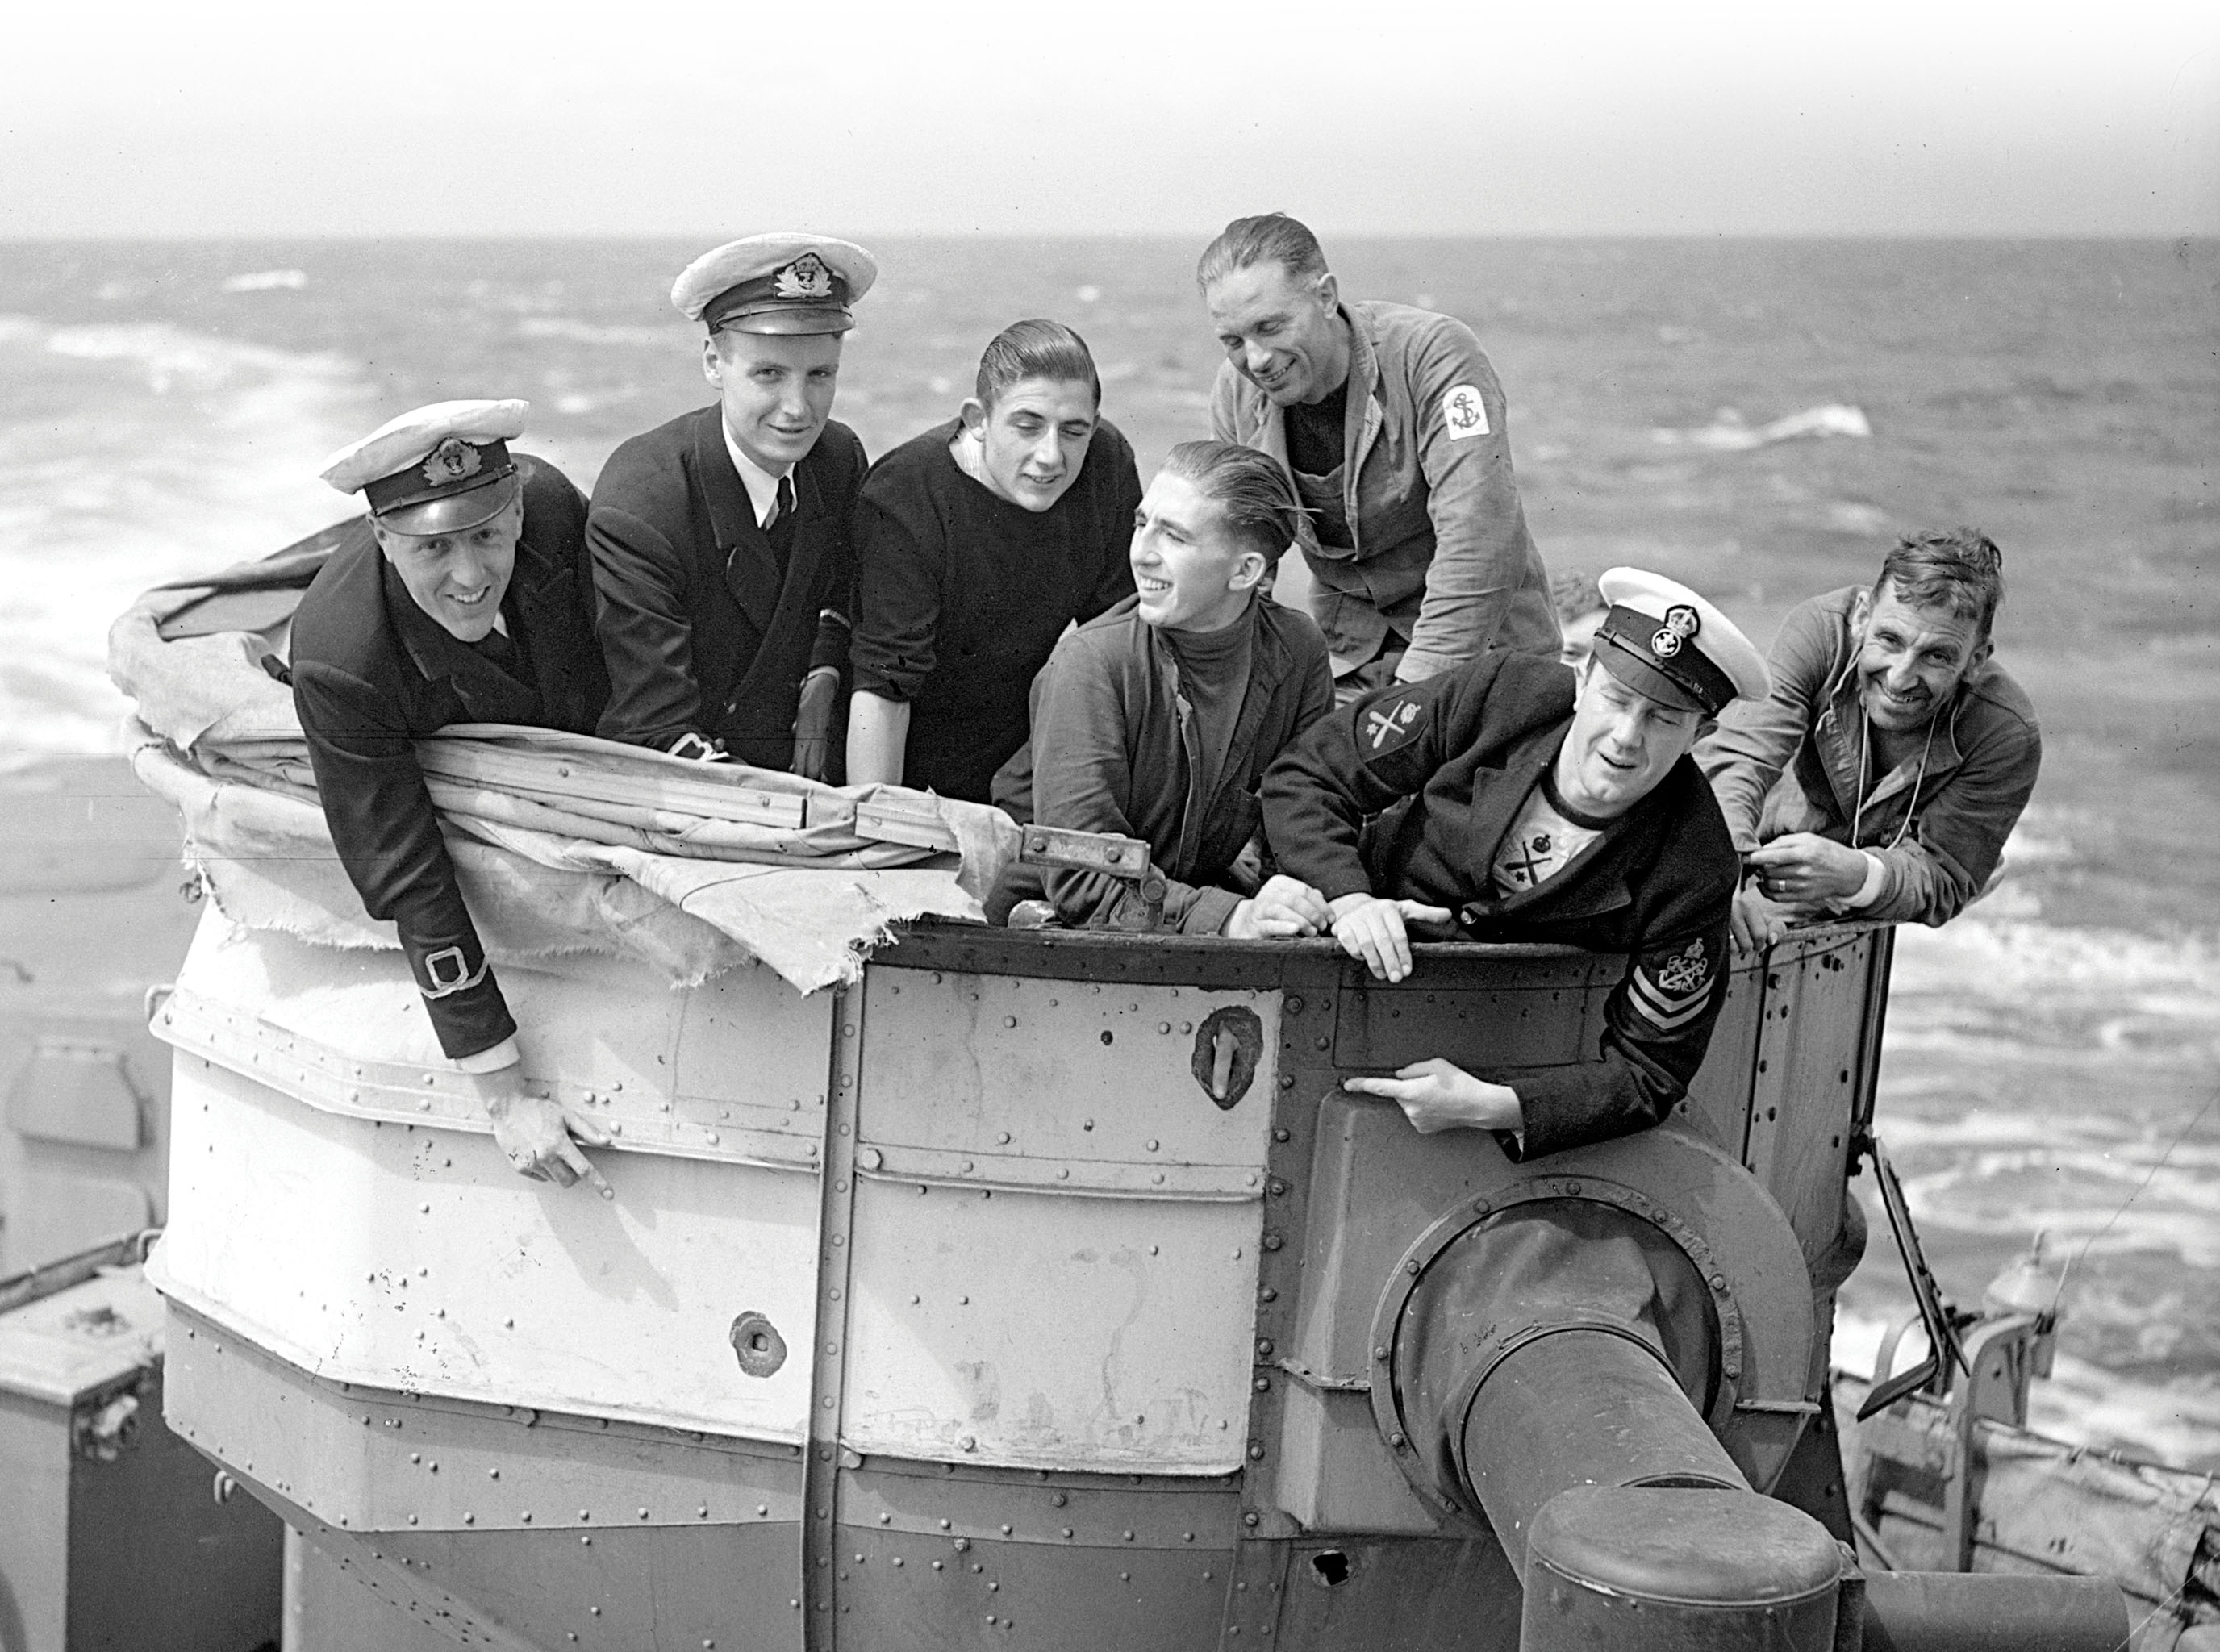
As expected, Bismarck and her consort, the heavy cruiser Prinz Eugen, were headed for the Denmark Strait, the cold, ice-laden and fog-shrouded passage between Iceland and Greenland. Based at Scapa Flow, an anchorage in Scotland’s Orkney Islands, the blocking force from Britain’s Home Fleet (which operated in the United Kingdom’s territorial waters) consisted of some radar-equipped cruisers, the aging but elegant battlecruiser HMS Hood and the new battleships Prince of Wales and King George V. Both of the heavy ships carried midshipmen from the RCN.
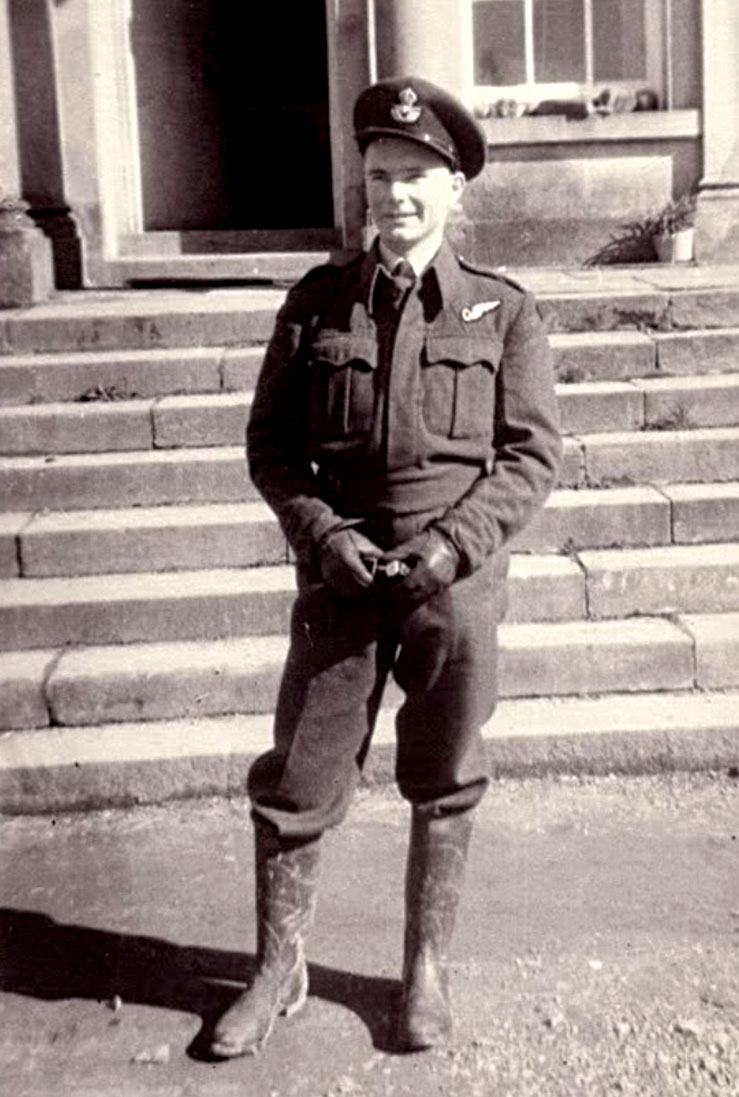
Midshipmen were young officer candidates—typically in their late teens—who had joined the professional RCN and were undergoing initial training in the gunrooms of the fleet. The “Mids” were “gentlemen” but not yet officers, and they were learning by doing. They were assigned to a myriad of tasks designed to familiarize them with the working of the ships and the noncommissioned officers and men who manned them.
Three RCN Mids were on Hood: T.N.K. Beard, F.F.L. Jones and S.J.B. Norman. On the evening prior to departing Scapa Flow for the Denmark Strait, these three took Hood’s steam picket boat—the last of its kind in the RN, nicely painted with gleaming brass fittings—to Prince of Wales to pick up Richard H. Leir, the lone Canadian Mid in that battleship’s gunroom, for a mess meal. After a night of dinner and rough “gunroom games,” the picket boat returned Leir to Prince of Wales. “I’ll get you over when we all get back,” Leir called out as the picket boat pulled away.
Sub-Lieutenant Stuart E. Paddon, Royal Canadian Naval Volunteer Reserve, was also aboard Prince of Wales as the ship’s radar officer. By the end of 1940, Paddon was one of 40 RCNVR radar officers in the British fleet assigned to large ships such as cruisers and battleships. Indeed, Canadian radar officers were so ubiquitous in the RN that when one British cruiser captain received a British radar officer, he complained to the Admiralty that he wanted a real radar officer, “A Canadian!” It is unknown how many other Canadian radar officers were with the Home Fleet or with Force H (the British naval formation based in Gibraltar) in the spring of 1941, but they would have been common. By 1941, there were also a few Canadian pilots on British aircraft carriers.
By the early morning of May 24, Hood and Prince of Wales were in the southern end of the Denmark Strait when Paddon got three blips at 24,000 metres on Prince of Wales’ main search radar. Two of these were Bismarck and Prinz Eugen, the third was a supply ship that soon slipped away. Paddon, locked away in a steel room, followed the action on his set. Leir had a better view, spotting from the periscope of Prince of Wales’ “A” turret, and he was able to glimpse the German ships. “First their two sets of battletops, then the handsome rakish hulls of the German ships with their ripple of gun flashes,” appeared before the first guns in his turret fired, Leir later wrote.
The Germans made short work of the action on May 24, sinking Hood with their third salvo. Leir knew something was amiss when his vision was suddenly obscured by “an orange reflection” followed by “tumbling, burning debris and a great falling tripod.” One of Bismarck’s 15-inch shells penetrated Hood’s armour, detonated her aft magazine and destroyed her in a shattering explosion.
“Jerking the periscope a little to the left,” Lier wrote, allowed him to witness “Hood’s long graceful foredeck canted up out of a towering pall of smoke. The great ship vanished in a maelstrom,” taking his young friends Beard, Jones and Norman with her. Harry Shorten, a Canadian sub-lieutenant serving on one of the escorting destroyers, recalled steaming through the site of Hood’s destruction moments later to find the sea littered with the wood that had covered her main deck. All but three of her 1,418-man crew perished.
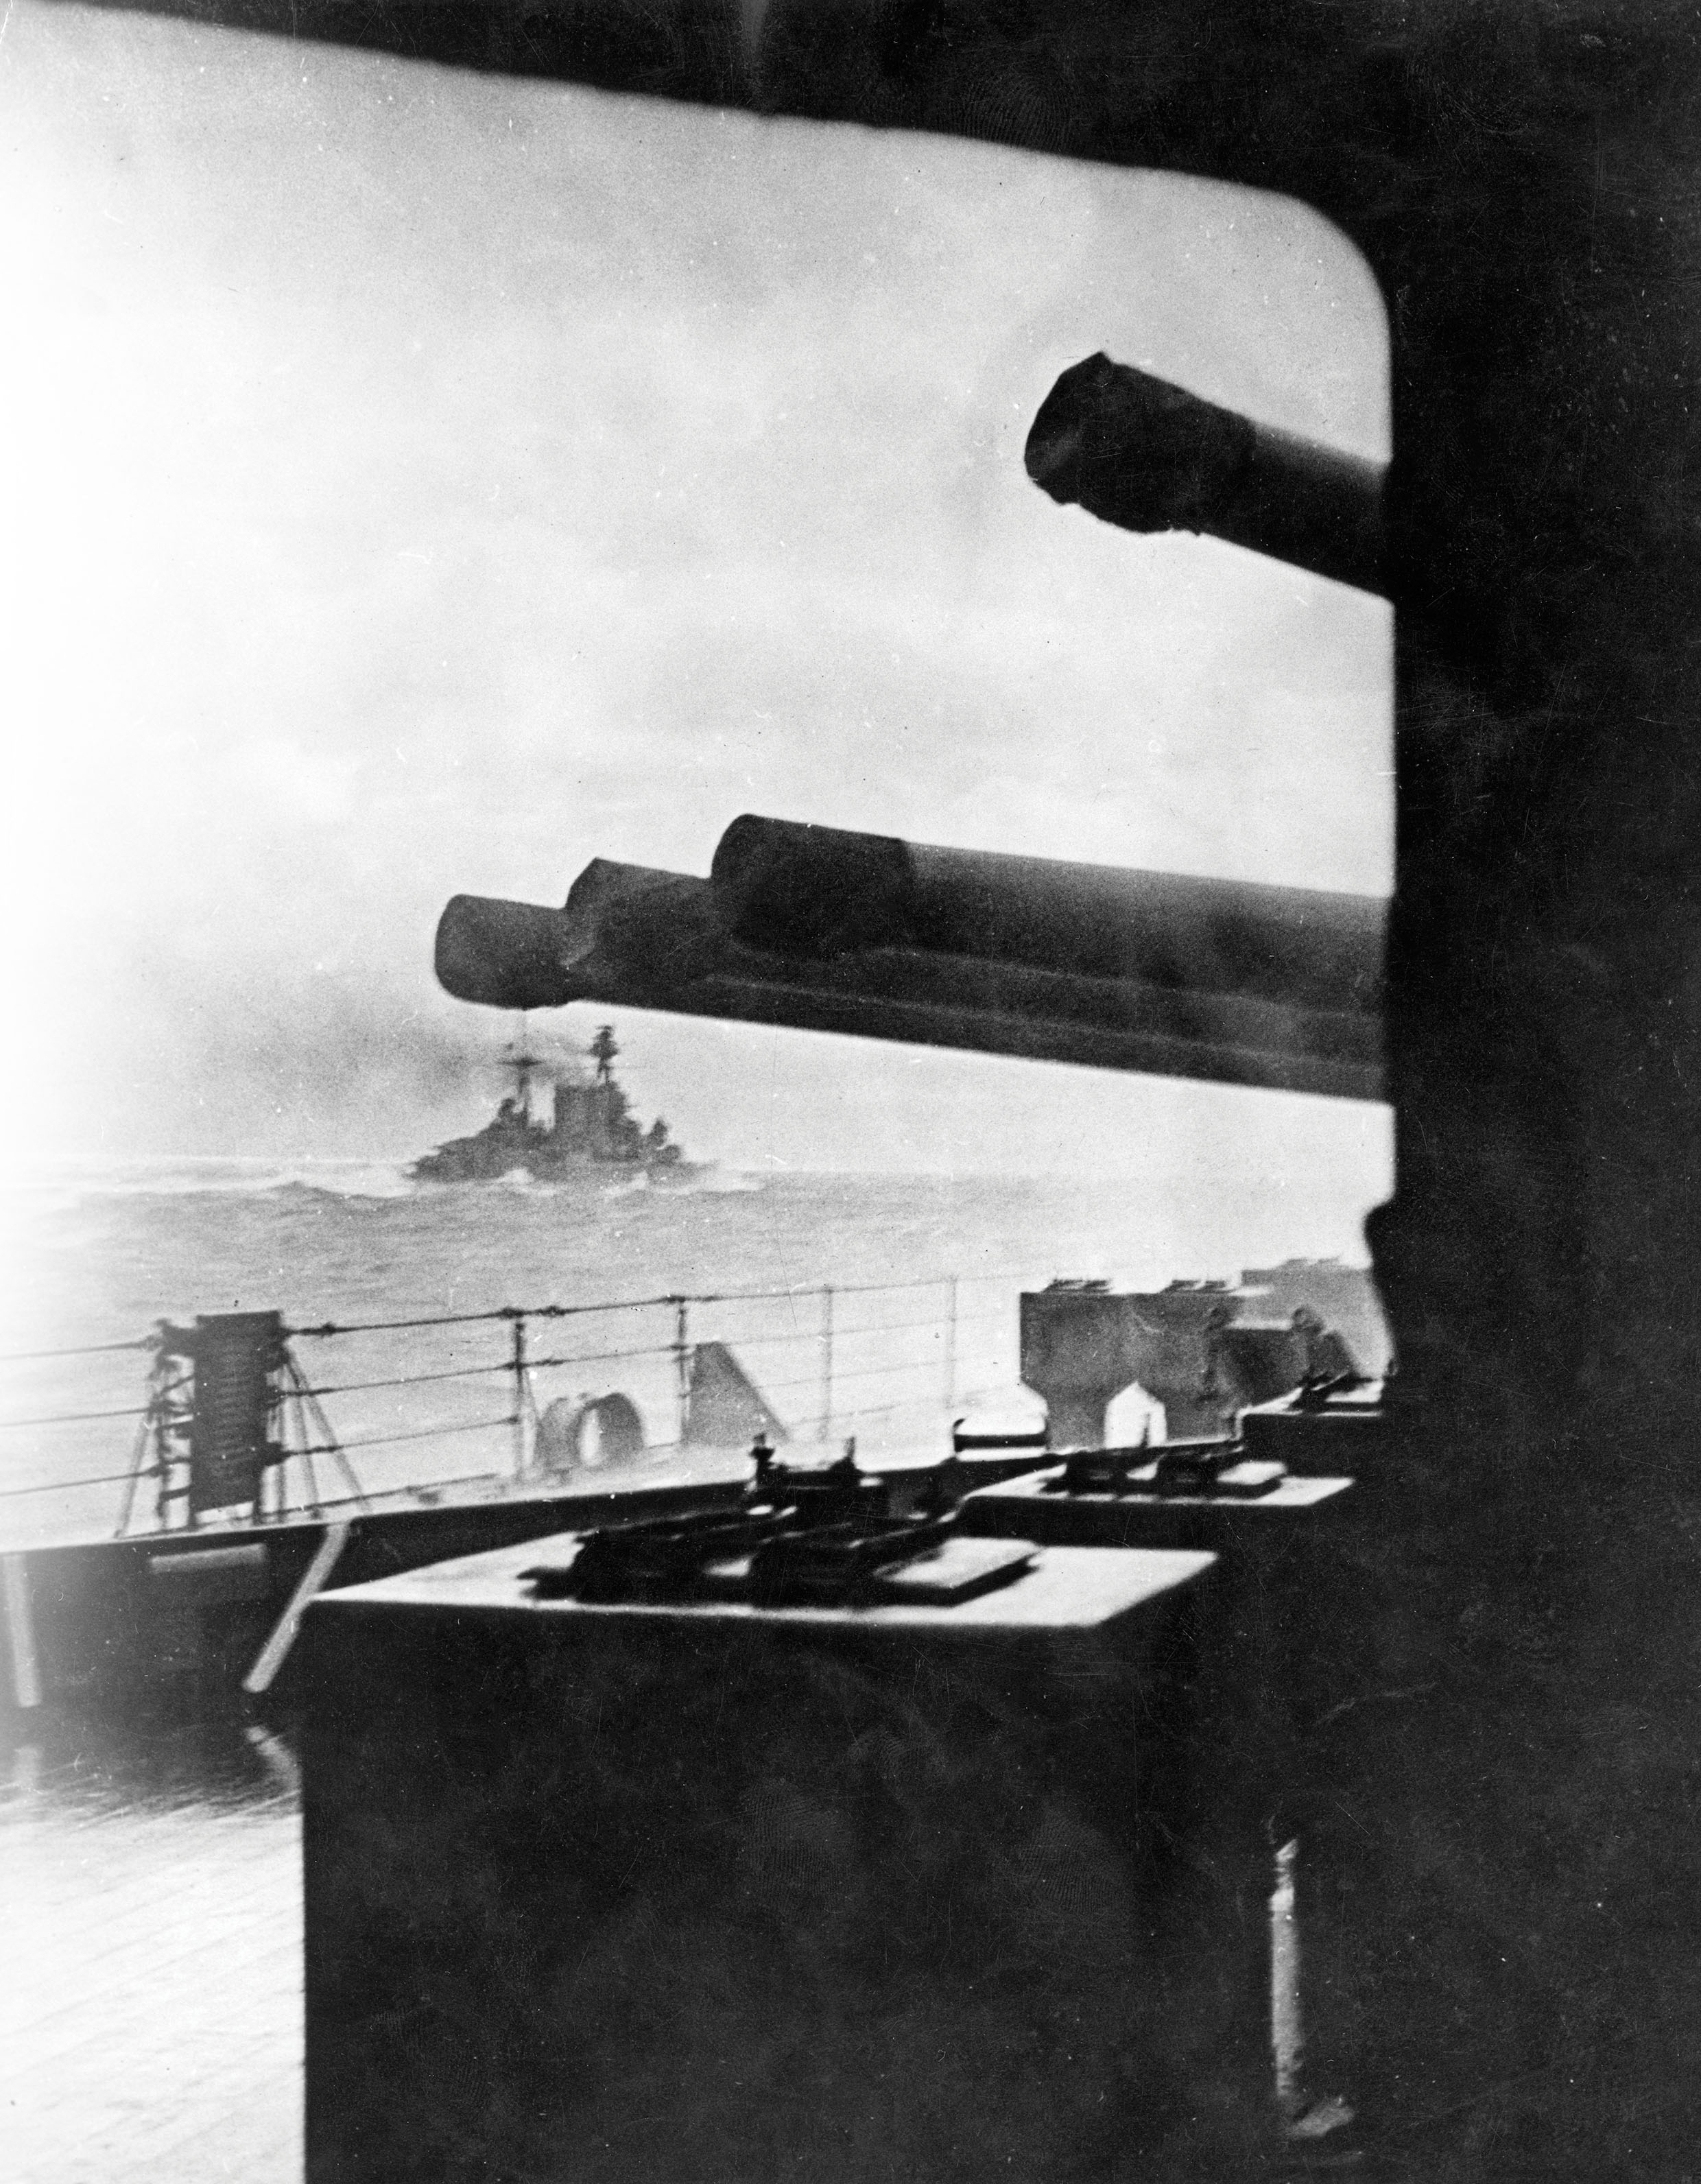
Meanwhile, Paddon watched more German shells coming in on his Type 281 radar set. One struck the bridge of Prince of Wales. It failed to explode, but the concussion and splinters of its passing killed everyone but the ship’s captain, including some of Paddon’s radar crew. The action also destroyed much of the battleship’s radar suite and jammed her aft four-gun turret. With Hood gone, Bismarck might have turned to finish off the damaged and ailing Prince of Wales, but she did not.
Both HMS Hood and
HMS Prince of Wales carried
midshipmen from the RCN.
Paddon switched his station to the battleship’s remaining Type 284 fire-control radar and kept track of Bismarck as the firing ended, while the crew of Prince of Wales worked feverishly to get her guns back in action, which they did by late afternoon.
The defeat—especially the loss of Hood, the pride of the Royal Navy—was a major blow to the British. But Bismarck did not have things all her own way. Three heavy shells from Prince of Wales struck the German giant, and one penetrated her forecastle at the waterline. This contaminated some of the ship’s fuel supply and flooded several forward compartments, giving her a list to port and a slight bow trim. It also increased the pressure on her internal structure at high speed.
The Germans spent the rest of May 24 dodging attacks. On several occasions, Bismarck turned to fire on her pursuers, exchanging fire again with Prince of Wales at around 4 p.m. Torpedo-equipped aircraft from HMS Victorious also attacked. None of these actions inflicted damage. However, the need to manoeuvre at high speed stripped away the work of damage-control parties on the hole in Bismarck’s forecastle, and forced water under extreme pressure to pour into boiler room number 2, which had to be abandoned. She was now down to a manageable speed of 20 knots.
The damage was sufficient to force Bismarck’s commander, Admiral Günther Lütjens, to abandon the plan for a North Atlantic cruise and head straight for the French port of Saint-Nazaire and its great dry dock. In the early hours of May 25, with repairs completed, fuel transferred to other tanks and under shelter of night, Bismarck and Prinz Eugen parted ways and gave the British the slip. By sunrise on May 25, the German raiders were nowhere in sight.
As Bismarck eluded her pursuers, the RCAF, which operated from bases in the Maritimes and Newfoundland, went on high alert. No. 10 Squadron, with its Douglas Digby two-engine bombers, stood by to attack with armour-piercing bombs, while Canadian (and still-neutral American) aircraft from Newfoundland pushed deep into the North Atlantic in search of the German ships, all to no avail.
Meanwhile, the Home Fleet and Force H, dispatched from Gibraltar, were both running low on fuel and needed to bring the Germans to action. Soon only the carrier HMS Ark Royal and the new battleship HMS King George V—sister to Prince of Wales—would remain. To guard against Bismarck bolting back to Germany, the Admiralty diverted the small, aged battleship HMS Ramillies from convoy duty to the southern entrance of the Denmark Strait.
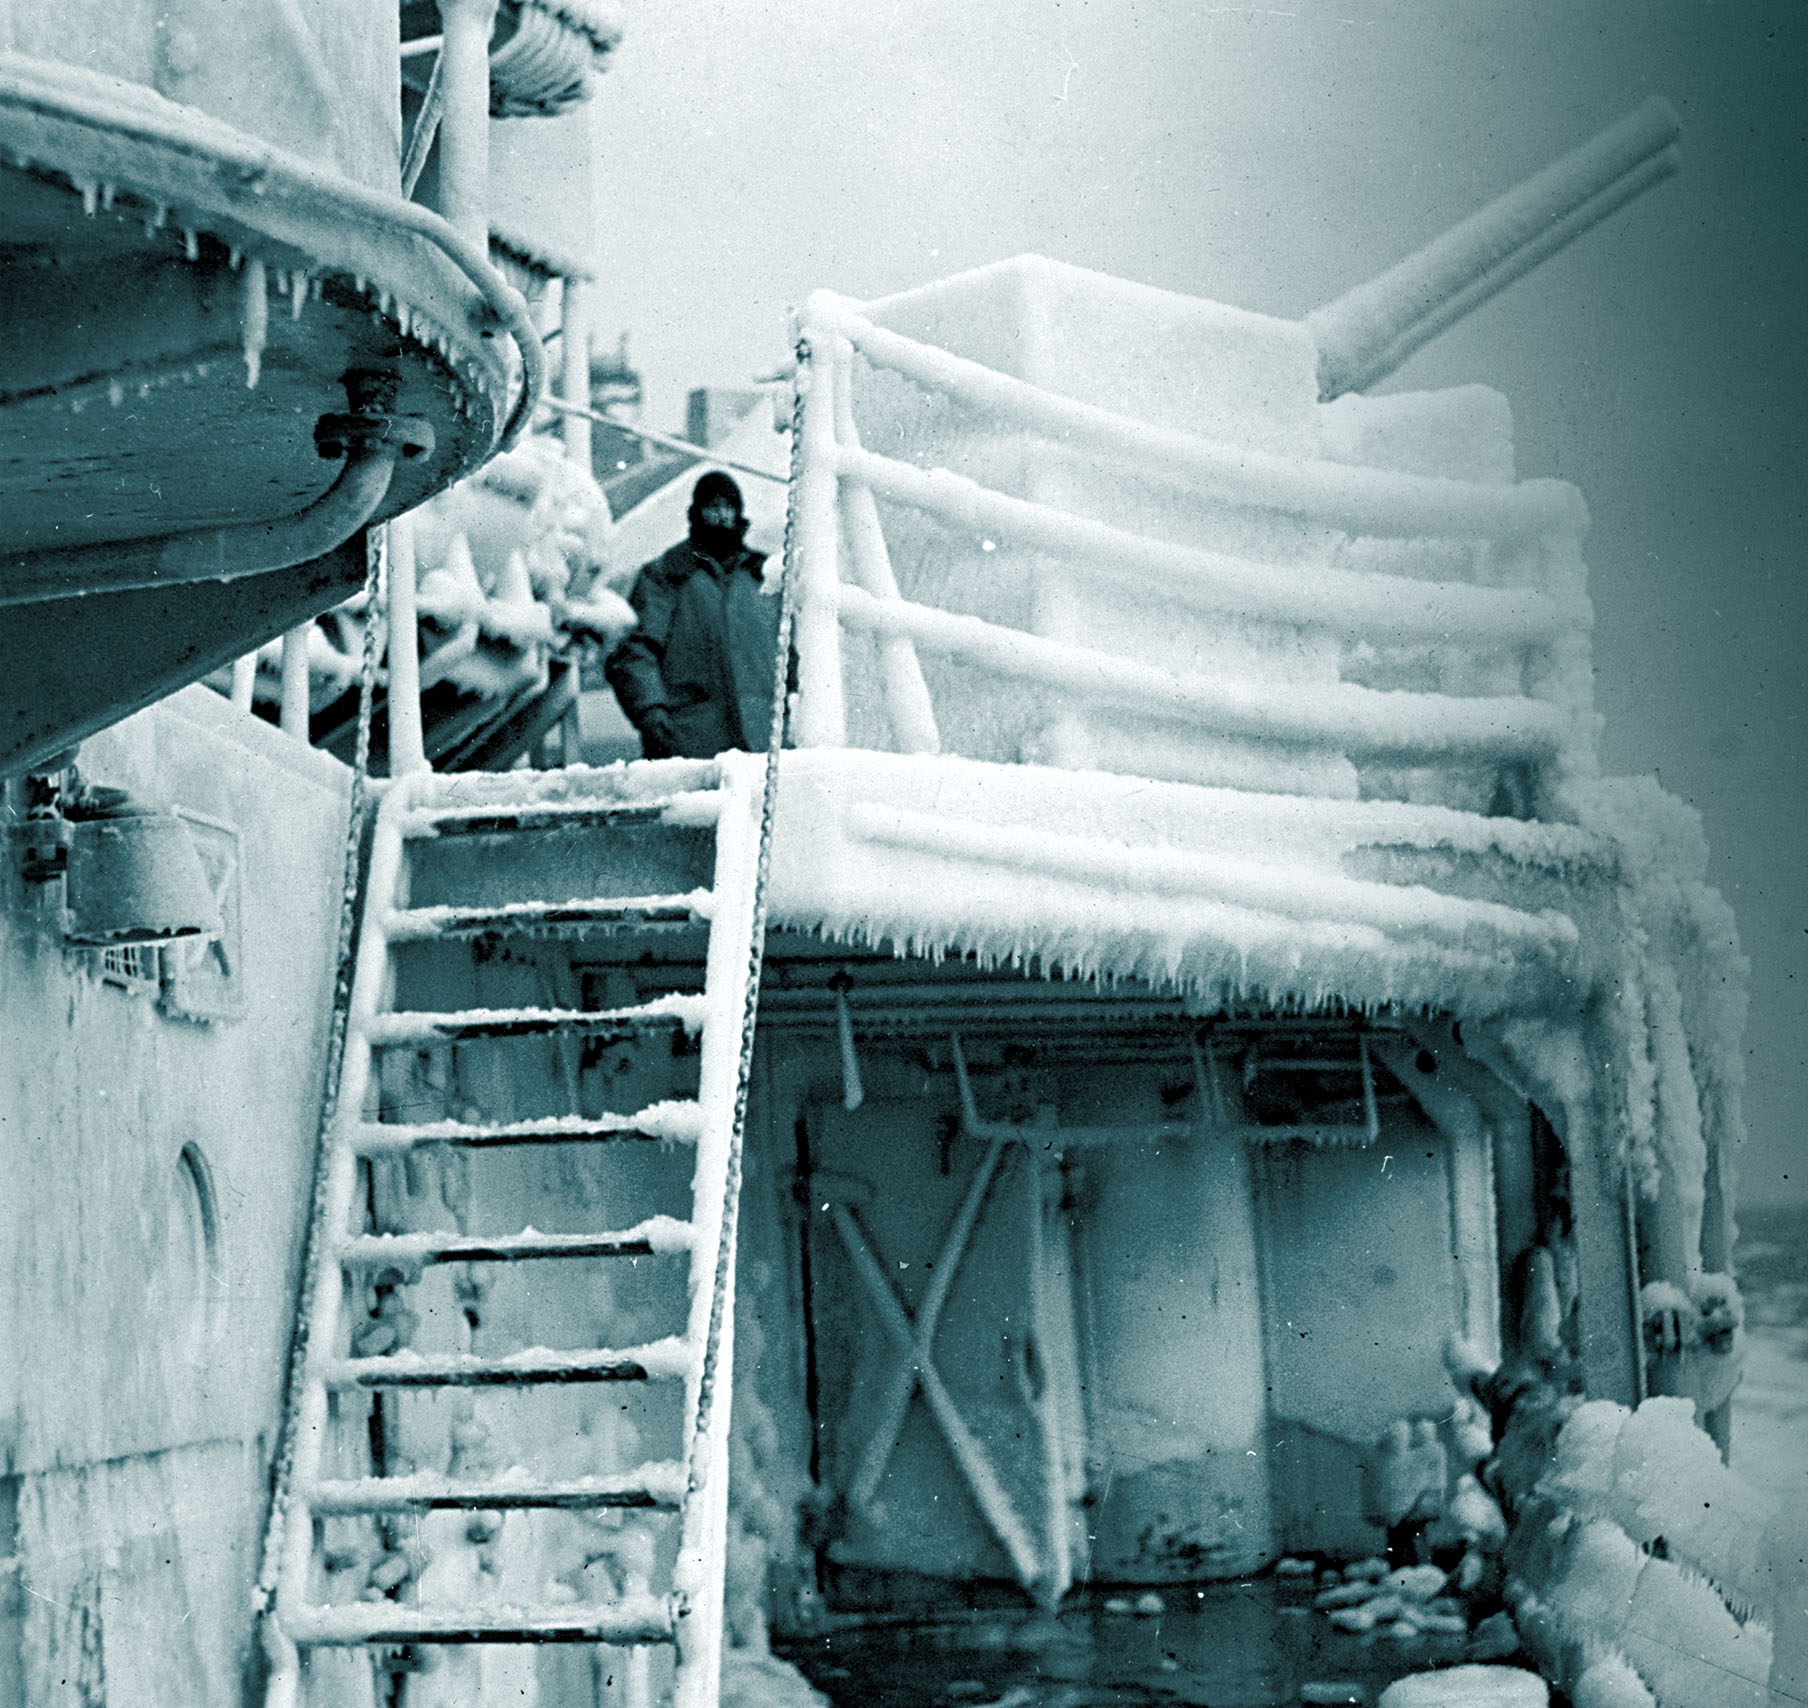
In May 1941, Ramillies carried some 30 RCNVR engineering personnel in training. The urgency of the moment was revealed to E. (Phipps) Phipps-Walker, then an Engine Room Artificer, when Ramillies suddenly cleared for action and fired a full broadside—something she had not done for decades. The shock pushed the old battleship sideways and shattered years of paint built-up on the asbestos insulation of her pipes. “People got damaged from falling slabs of paint,” recalled Phipps-Walker. More ominously for Bismarck, the Admiralty also diverted the modern battleship HMS Rodney, equipped with nine 16-inch guns, from her passage to the United States for a refit to help.
It was not much. The Atlantic is vast and it looked for a time as if Bismarck would make it to France. She might well have escaped but for the long signal she sent on May 25 outlining her damage and change in plans. While code breakers worked to read the signal, direction-finding (DF) stations around the Atlantic relayed their fixes on Bismarck’s transmissions. They also tracked the U-boats gathering to shelter her.
One of the most important of these fixes came from the RCN’s DF station at Hartlen Point, at the outer reaches of Halifax Harbour. That station was noted for its efficiency: the Admiralty sent the RCN a telegram after the fact to say that the fixes from there and British Guiana were “of considerable value in locating the Bismarck.”
Certainly the DF fixes helped to guide air searches. Before dawn on May 26, two RAF Catalinas took off from Lough Erne, Northern Ireland, to search an area that Bismarck would likely steam through. Aboard one of them was 19-year-old RCAF navigator Sergeant Gaynor Williams (who later self-published a book about his experience, titled The Wartime Journals of a Prairie Kid).
At 10:30 a.m. on May 26, one of those Catalinas sighted the Bismarck 1,280 kilometres west of Brest, France. The cruiser HMS Sheffield soon found the German battleship and the shadowing resumed. Bismarck’s course and speed gave the British about 24 hours until she reached the comparative shelter of U-boat and Luftwaffe coverage.
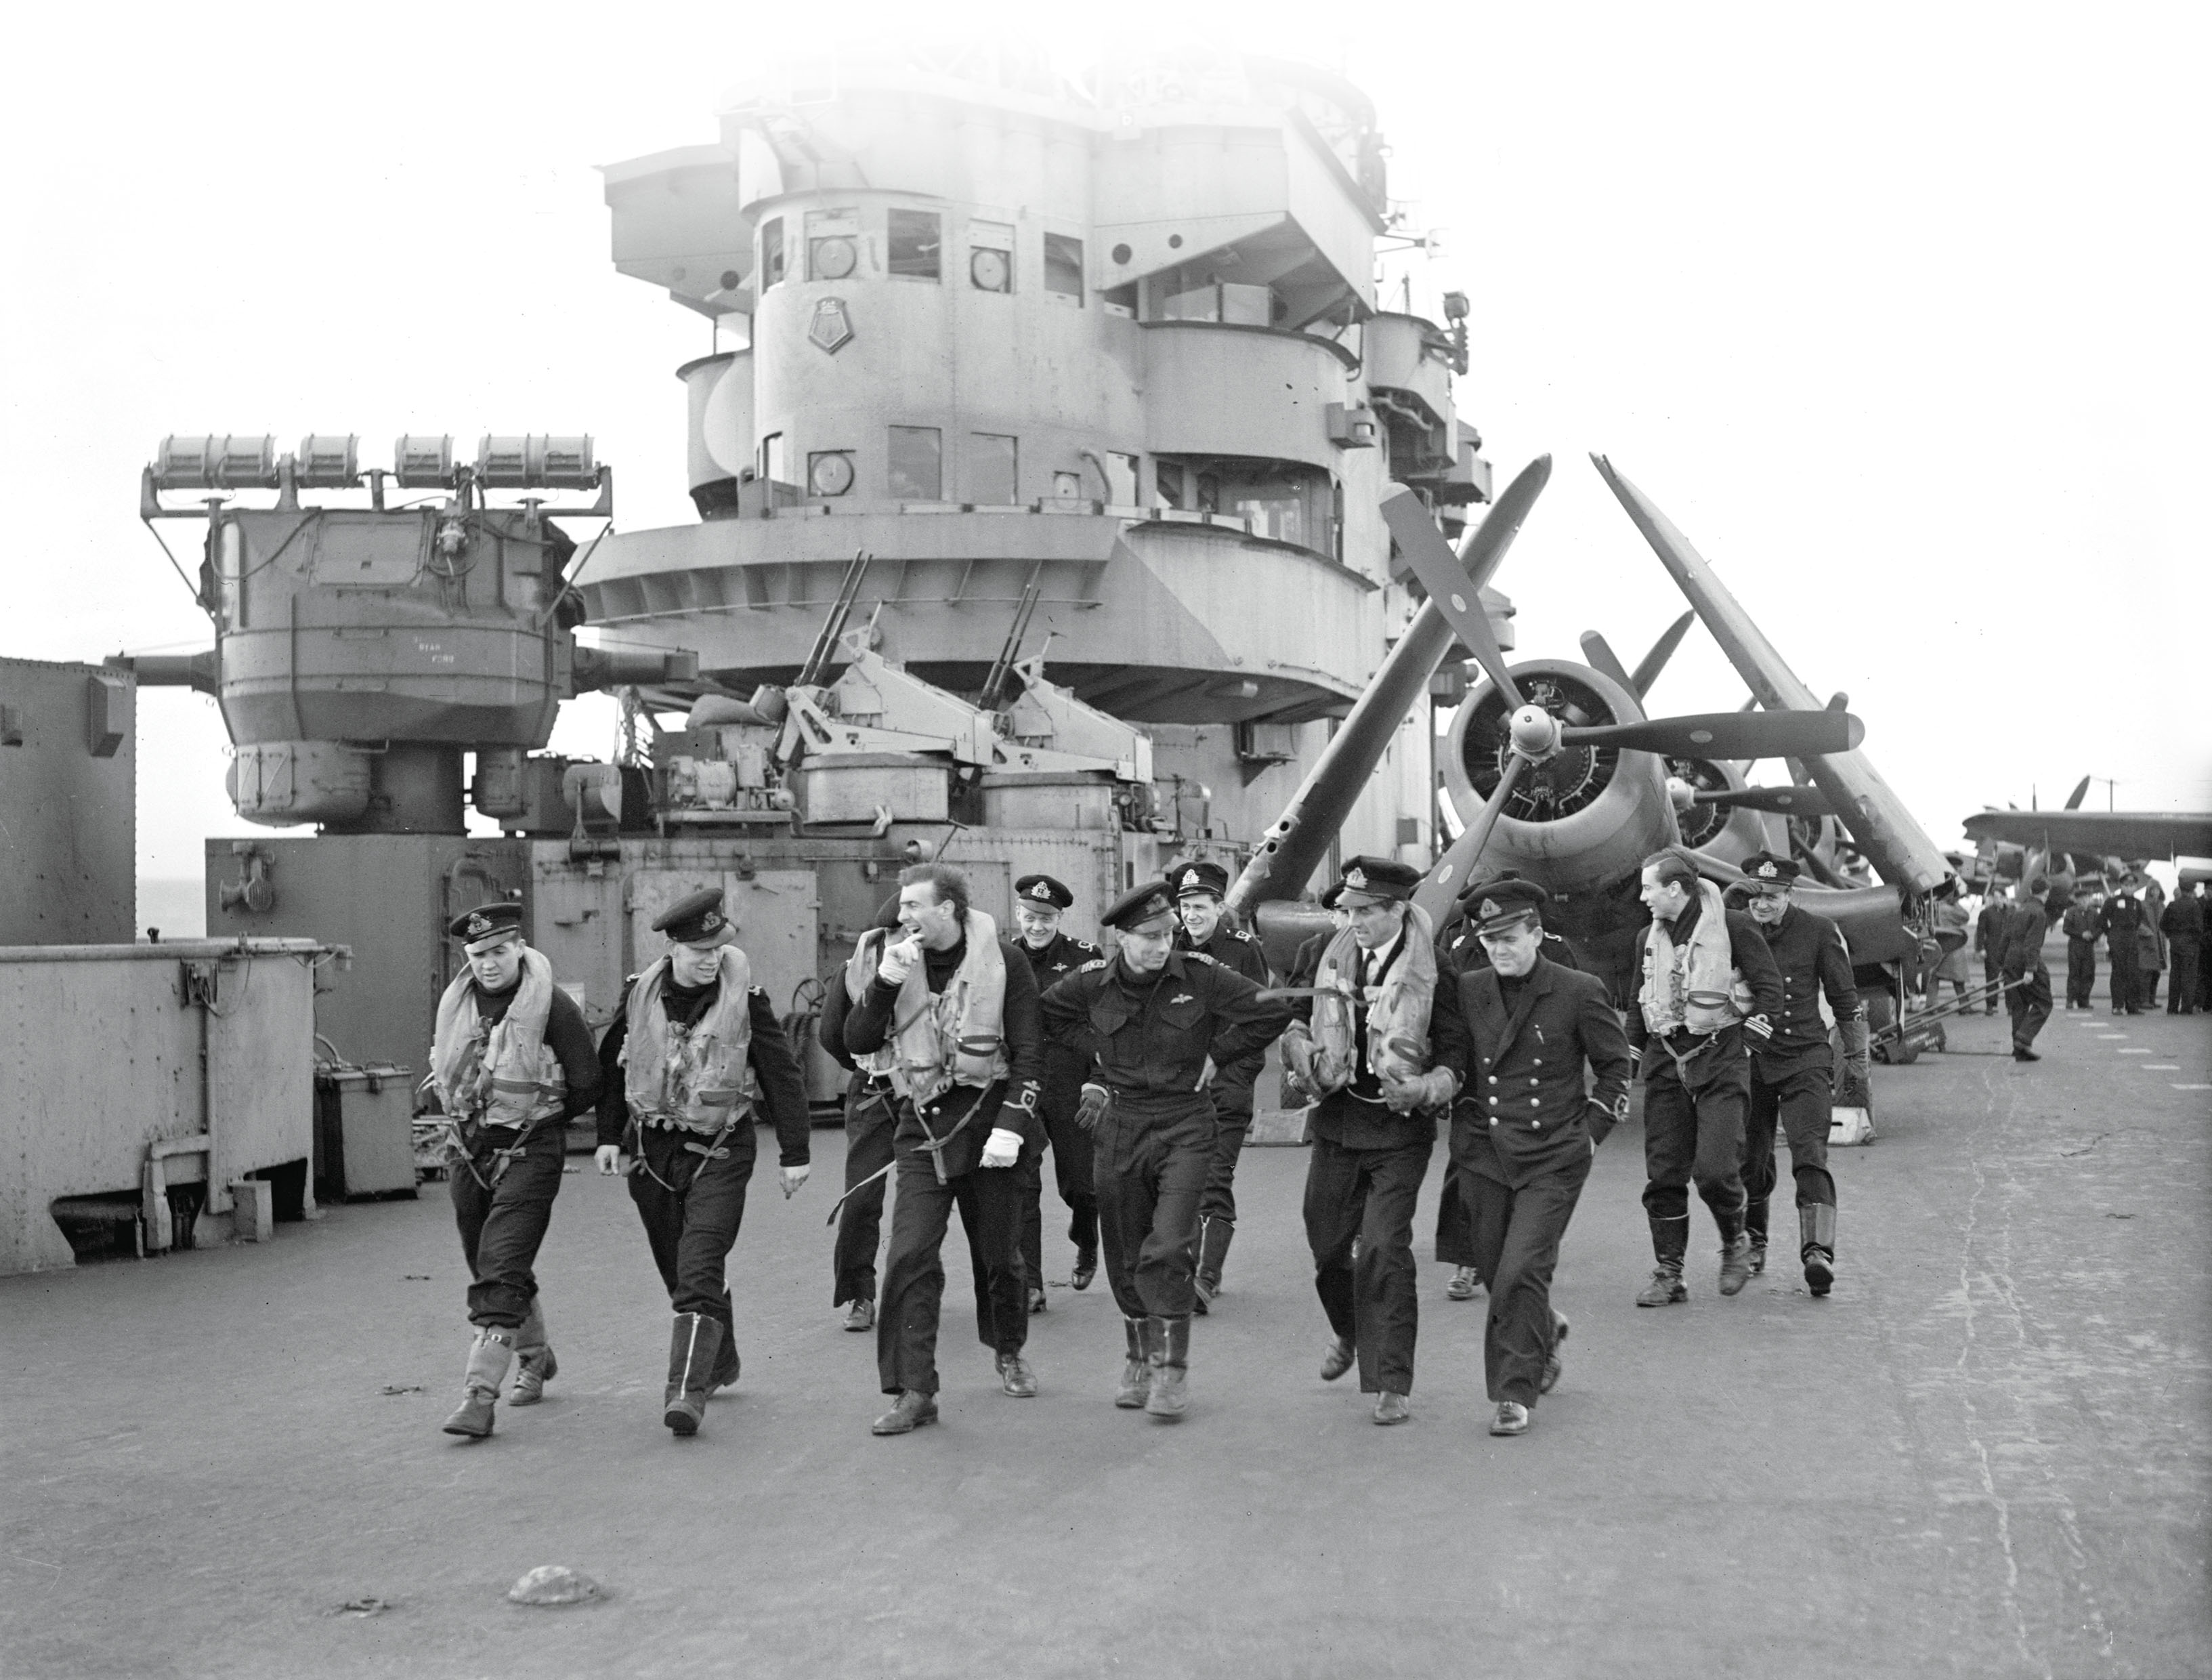
The only British forces within striking distance on May 26 were the three squadrons of the Fleet Air Arm aboard the carrier Ark Royal, which wasn’t much. Britain’s torpedo-strike aircraft was the lumbering Fairey Swordfish biplane, with a top speed of 224 kilometres per hour. Taking off from a slippery, heaving flight deck in strong northwest winds, the first 15 Swordfish took to the air at 2:50 p.m.
The first attack by Ark Royal’s Swordfish, using new magnetic detonators on the torpedoes, inadvertently targeted Sheffield, which escaped unscathed. This was not a favourable portend. At 8:30 p.m., the second attack—using torpedoes with proven contact detonators—was successful, but in an entirely fortuitous way. Two torpedoes hit Bismarck. One struck amidships, causing minor damage and flooding. The other struck near the port side rudder while Bismarck was manoeuvring, and all attempts to release the rudder from its 12 degrees of turn failed.
Less than half an hour after the Swordfish departed, Bismarck radioed that she was unmanoeuvrable. Like Achilles, she had been wounded in the heel and her fate was sealed. Some thought the fateful torpedo hit was the work of a Canadian pilot, but we now know the honour went to Royal Navy Lieutenant John Moffat.
As Bismarck turned gentle circles in the choppy North Atlantic, the British brought in the big guns: Rodney and King George V. At 8:47 a.m. on May 27, Rodney opened fire with 16-inch shells at a range of some 23 kilometres, followed minutes later by the 14-inch guns of King George V. Bismarck’s return fire was adversely affected by her inability to manoeuvre, but that soon became irrelevant. Shortly after 9 a.m., a shell from Rodney struck Bismarck’s forward superstructure, killing her command staff and hundreds of men, wrecking her bridge and disabling her forward guns.
A shell from HMS Rodney struck
Bismarck’s forward superstructure,
killing her command staff
and hundreds of men, wrecking her
bridge and disabling
her forward guns.
By 10 a.m., Bismarck was a floating wreck, her main armament was disabled and she was on fire from stem to stern. Still, her secondary armament continued to fire, and so Rodney closed to 2,700 metres, so close that Rodney was also able to hit Bismarck with torpedoes.
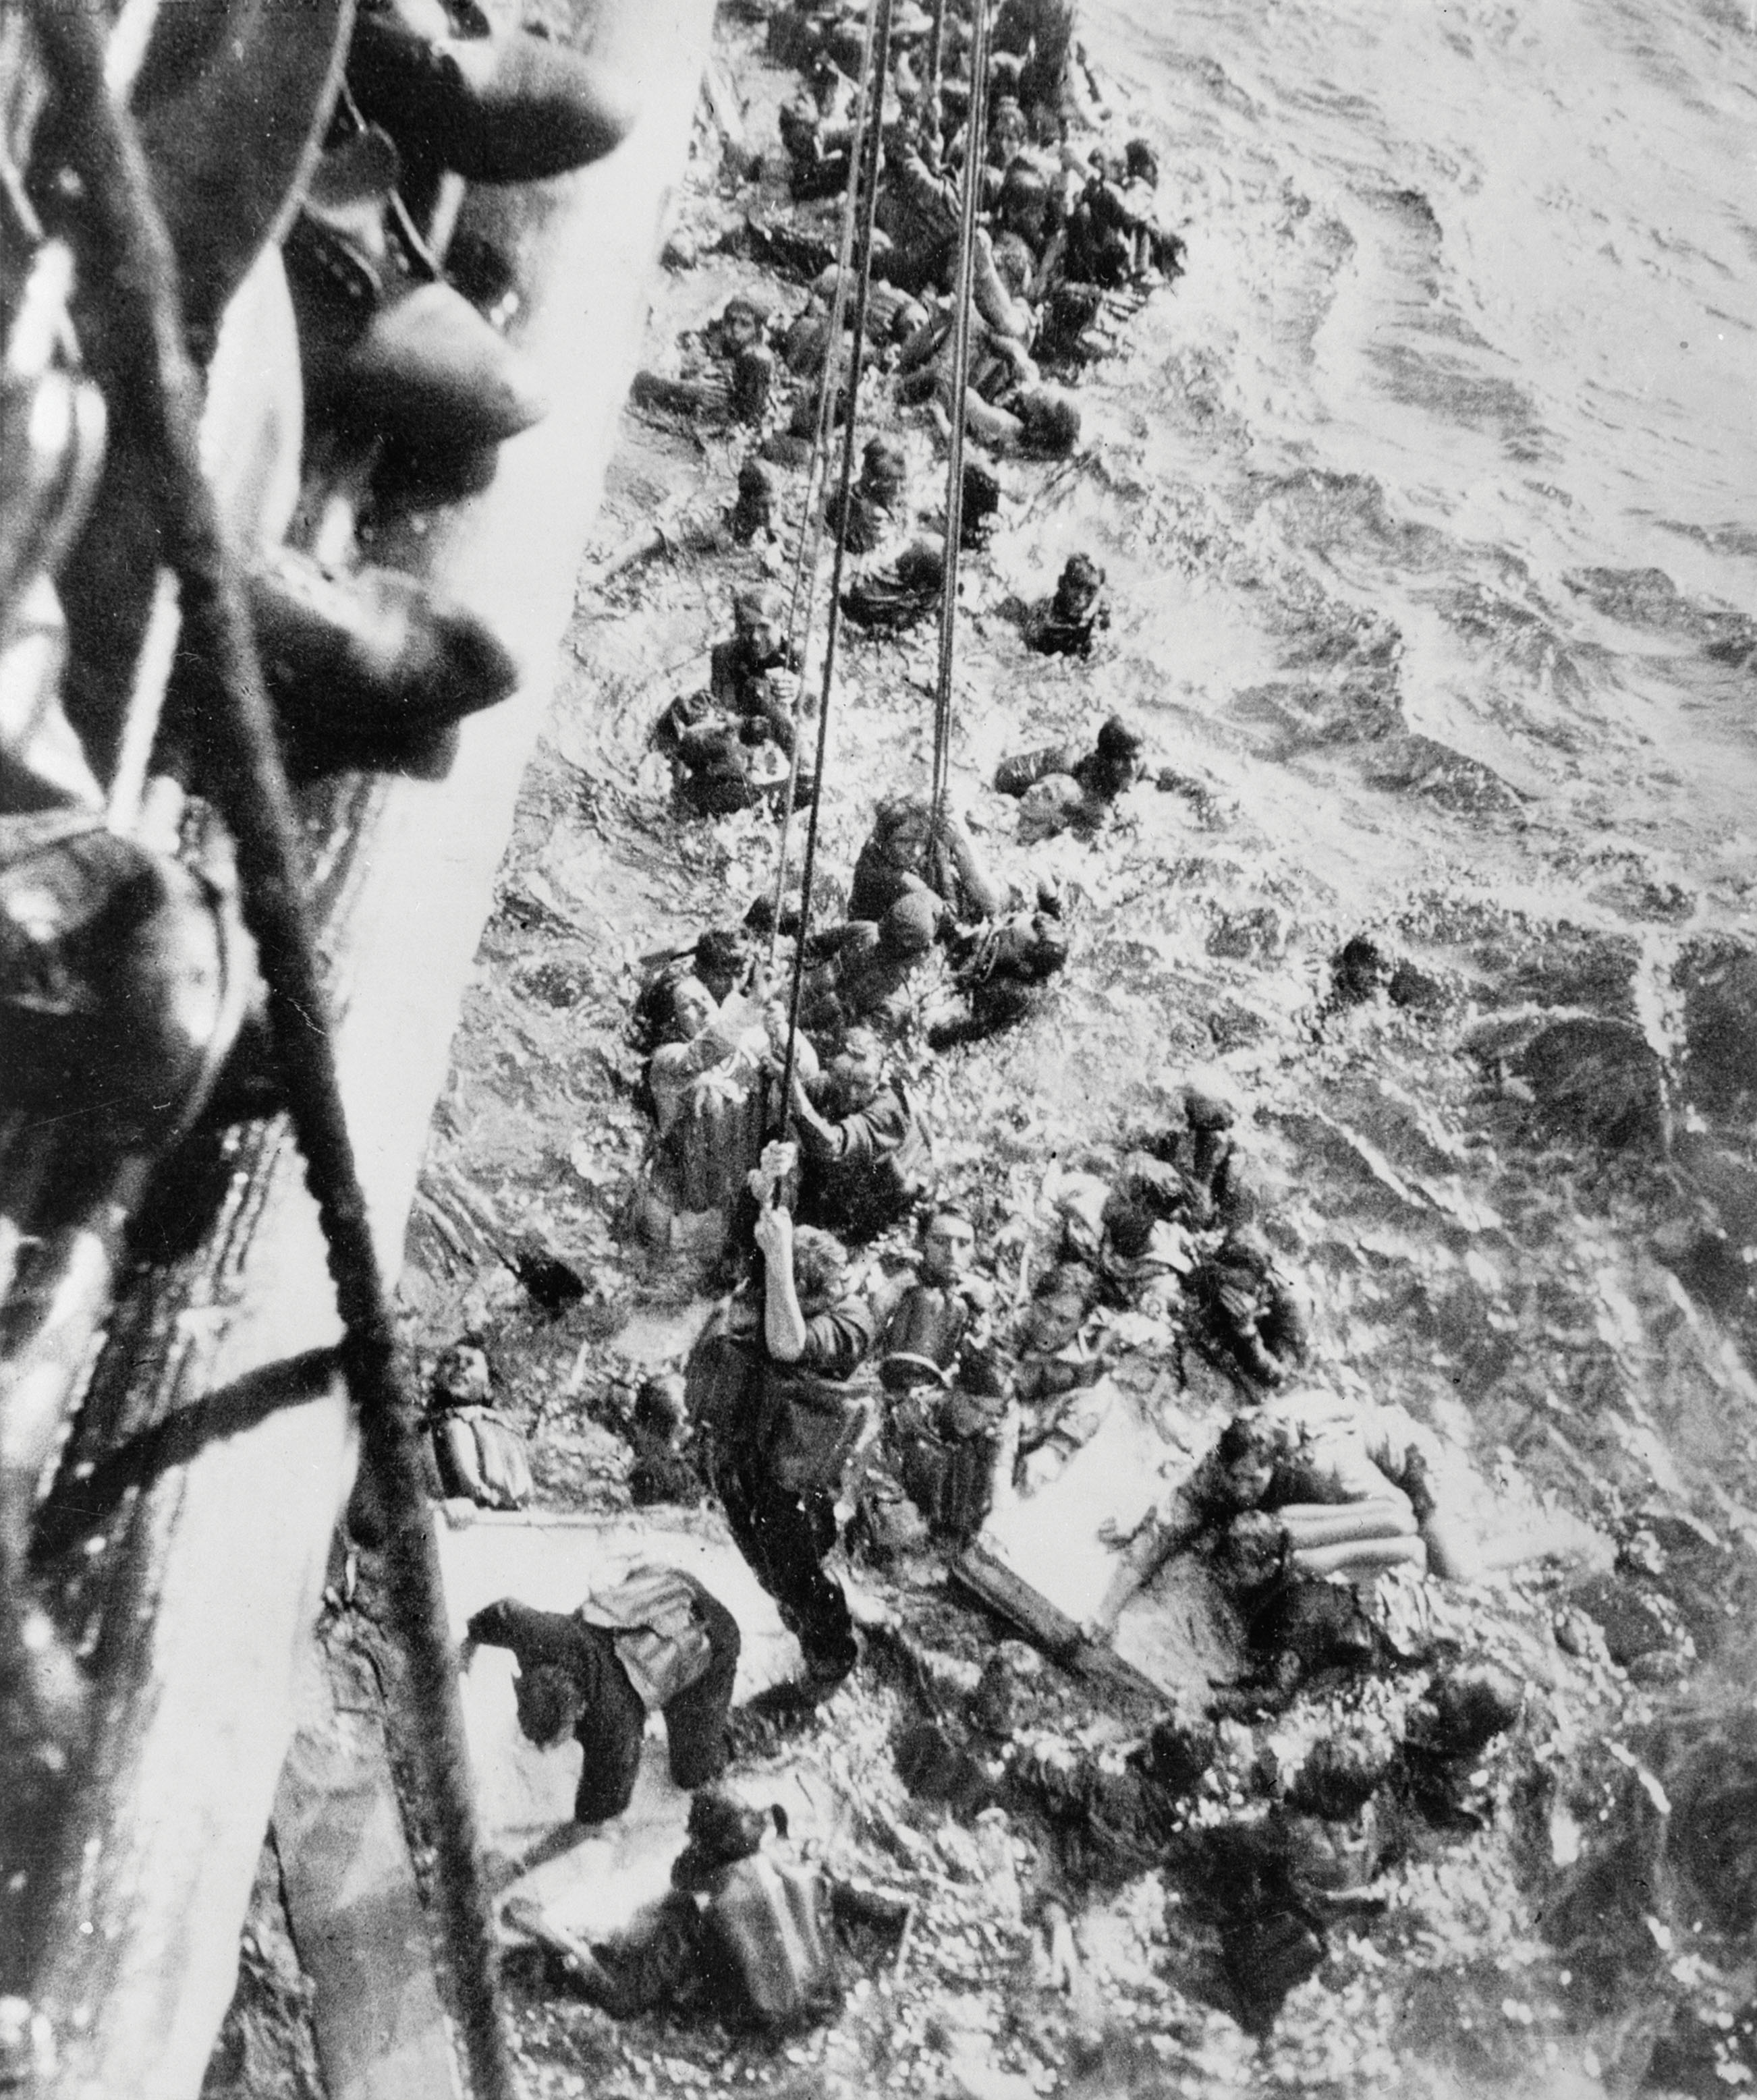
At 10:20, Rodney was called off and the cruiser HMS Dorsetshire went in to finish Bismarck with torpedoes. By then, she was already on her way down, flooded by her own crew. More than 2,100 of her crew perished; only 114 survived. Survivors later claimed that Bismarck scuttled herself, but it is a moot point. By 10:40, the brief but dramatic career of the Bismarck was over, and a handful of Canadians had played their own modest roles in her historic demise.
The destruction of the Bismarck was a signal victory for the British. Over the previous winter, the German battlecruisers Gniesenau and Scharnhorst, the heavy cruiser Hipper and the pocket battleship Scheer had roamed the midocean with impunity. Sheltered by winter darkness and dreadful weather, they had defied every attempt to bring them to battle: they had pulled the lion’s tail and gotten away with it. Not so Bismarck. The battlecruisers and Hipper still lay in French ports, but the loss of Bismarck made the Germans reticent to commit her sister Tirpitz to a similar fate. Historians now mark her destruction as a turning point in the Atlantic war.
Attacking the Tirpitz

There were several independent navies in the British Commonwealth in 1939, but they functioned as something of an imperial fleet. Officers received some of their training in the Royal Navy, they all appeared in the British Admiralty’s Navy List, seniority was recognized across the navies, and even ship names were co-ordinated to avoid confusion.
It was not unusual, therefore, for Royal Canadian Navy midshipmen to be in major British warships, especially early in the war. But the RCN also sent other, hostilities-only Volunteer Reserves to serve in the RN, and Canadian personnel manned some larger British ships toward the end of the war as the RCN prepared to operate cruisers and aircraft carriers.
In early 1940, the RN needed junior officers for its expanding fleet. In the days before the RCN planned its own massive expansion, it seemed like a good idea to send the yachtsmen who clambered to join Canada’s navy as officers overseas to meet British needs. An initial batch of these “Sunday sailors” went to the RNR officer training centre at HMS King Alfred, the shore establishment in Hove, Sussex, in early 1940, just in time for the Dunkirk evacuation. The British also needed officers with electronics training to operate its expanding suite of radars. Canadian universities helped the RCN fill that need. First the RCN recruited men with a few years of undergraduate courses in engineering, and then several universities established specific electrical engineering courses for batches of specially trained Canadian radar officers destined for the RN. The RCN also manned several British lend-lease destroyers that operated in Canadian waters.
In the middle of the war, the RCN started helping crew some larger RN ships as part of the Canadian plan to acquire cruisers and aircraft carriers. This included the 80 RCN personnel aboard HMS Belfast during the Battle of North Cape in December 1943—when the German battleship Scharnhorst was sunk by the battleship HMS Duke of York and several cruisers and destroyers.
The auxiliary carrier HMS Nabob was among the first larger British ships to be fully manned by the RCN. Built in the United States, she operated Grumman Avenger
torpedo bombers and Wildcat fighters of 825 Naval Air Squadron of the RN Fleet Air Arm, piloted by New Zealanders.
Nabob had a short operational career. On Aug. 1, 1944, she joined the Home Fleet and operated off northern Norway with the new RCN destroyers HMCS Algonquin and HMCS Sioux among her escorts. Her first operation was to mine inshore waters to force German convoys out into the ocean where they were easier to attack.
Her second operation, launched from Scapa Flow in the Orkney Islands on Aug. 18, supported an attack on the Bismarck’s sister ship, Tirpitz, as she lay menacingly in Norway’s Altafjord. While strike aircraft from three British carriers hit Tirpitz, Nabob’s Avengers, and others from HMS Trumpeter, mined Altafjord to keep Tirpitz bottled up.
Bad weather scuppered operations on Aug. 21, and almost totally disrupted them again the next day. Nabob was unable to launch her aircraft and her task force withdrew to wait a few days before trying again. As they did, U-354 hit Nabob in the stern with an acoustic homing torpedo. Damage was extensive, and it looked like the ship would be lost. But superb damage control and seamanship got Nabob back to Scapa Flow, where she was declared not worth repairing.
A second Canadian-manned carrier, HMS Puncher, joined the Home Fleet in early 1945, equipped with the only torpedo strike squadrons still available. She spent the last weeks of the war on guard in case any of the remaining large German ships tried to escape into the Atlantic.
The Royal Canadian Navy always imagined itself duelling with the enemy in great battles. This vision shaped the scheme to acquire a fleet of powerful Tribal-class destroyers in 1939 and, by 1943, cruisers. The Tribals were virtually light cruisers, almost 2,000 tonnes equipped with six 4.7-inch guns, four 21-inch torpedo tubes and a top speed of 36 knots.
She was finally sunk by
torpedoes launched by destroyers
and cruisers, including Belfast.
By Christmas Eve 1943, four RCN Tribals were operating with the British Home Fleet covering convoys off northern Norway. Athabaskan was with the fighting escort (distinct from the anti-submarine escort) of convoy RA 55A, heading west near isolated Bear Island. Covering them was Force 1: three British cruisers, including HMS Belfast, with 80 Canadians aboard training to man the RCN’s new cruisers. Farther west, covered by the battleship HMS Duke of York, one cruiser and four destroyers of Force 2, was the Murmansk-bound convoy JW 55B with HMC ships Huron, Haida and Iroquois in the fighting escort. Between the two convoys was Altafjord, where the German battlecruiser Scharnhorst and five powerful Narvik-class destroyers lay.
Scharnhorst and the Narviks put to sea late on Christmas Day, something British intelligence had detected. RA 55A was the closest target, so Force 1 gathered destroyers from the fighting escort and set off to intercept the German squadron. Athabaskan, known for her limited endurance, stayed with the convoy.
Scharnhorst was actually closer to JW 55B by the time Belfast detected her on radar. The star shells and gun flashes of the subsequent action were clearly seen by the Canadian Tribals guarding the convoy. When Belfast—whose nine 6-inch guns were vastly out-ranged by Scharnhorst’s nine 11-inch guns—tried to engage, Scharnhorst went to 30 knots and muscled her way to the northeast through seas too rough for Belfast to handle at that speed.
That retreat brought the Germans into contact with the cruiser HMS Norfolk of Force 2, which hit Scharnhorst with 8-inch shells and destroyed her forward fire-control radar. As the action swirled north of JW 55B, much of the fighting escort of the convoy was also called away to support the heavy ships, leaving Huron, Haida, Iroquois and a British destroyer to provide close cover. As gun flashes from British cruisers and Scharnhorst lit up the night sky, they prepared for a surface action, which never materialized. In addition to the threat from the battlecruiser, there was a danger that the five Narviks, now lost and trying desperately to find Scharnhorst, might stumble into JW 55B.
The action ended on Dec. 26, when Scharnhorst was cornered by Force 1 and Force 2 and the British moved Duke of York in for the kill. As Belfast illuminated the scene, the battleship’s 14-inch guns—superbly directed by radar—proved too much for Scharnhorst and she was soon a flaming wreck. She was finally sunk by torpedoes launched by destroyers and cruisers, including Belfast. The Narviks escaped to fight another day.
The Canadian Tribals all earned the Battle of North Cape battle honour. Haida is now preserved and on display in Hamilton, Ont., while Belfast—whose 80 Canadians saw action in the battle—is on display in London, England.
Advertisement